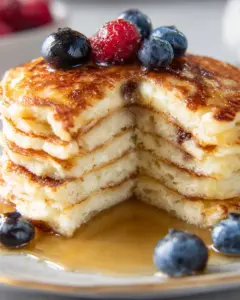
With a delightful balance of sweet and tangy, Mini Lemon Cheesecake Tarts are the perfect bite-sized treat for any celebration. Whether you’re hosting a spring gathering or a summer barbecue, these no-bake tarts will impress your guests. Their creamy lemon filling nestled in a crunchy crust makes them irresistible. Plus, they can be easily customized with your favorite fruits!

Jump to:
- Why You’ll Love This Recipe
- Tools and Preparation
- Essential Tools and Equipment
- Importance of Each Tool
- Ingredients
- For the Crust
- For the Filling
- For Garnish
- How to Make Mini Lemon Cheesecake Tarts
- Step 1: Prepare the Crust
- Step 2: Make the Filling
- Step 3: Assemble the Tarts
- Step 4: Garnish and Serve
- How to Serve Mini Lemon Cheesecake Tarts
- For a Refreshing Touch
- As a Party Platter
- Pairing with Beverages
- For Special Occasions
- How to Perfect Mini Lemon Cheesecake Tarts
- Best Side Dishes for Mini Lemon Cheesecake Tarts
- Common Mistakes to Avoid
- Storage & Reheating Instructions
- Refrigerator Storage
- Freezing Mini Lemon Cheesecake Tarts
- Reheating Mini Lemon Cheesecake Tarts
- Frequently Asked Questions
- Can I use store-bought crusts for Mini Lemon Cheesecake Tarts?
- How do I customize my Mini Lemon Cheesecake Tarts?
- What should I serve with Mini Lemon Cheesecake Tarts?
- How long do Mini Lemon Cheesecake Tarts last?
- Final Thoughts
- 📖 Recipe Card
Why You’ll Love This Recipe
- Quick and Easy: These mini tarts require no baking, saving you time and effort in the kitchen.
- Deliciously Tangy: The fresh lemon juice and zest provide a bright flavor that’s sure to delight your taste buds.
- Versatile Garnish Options: Top with fresh fruit or preserves to match the season or your event theme.
- Perfect Portion Sizes: Each tart is just the right size for satisfying your sweet tooth without overindulging.
- Impressive Presentation: Their small, elegant appearance makes them an eye-catching dessert at any occasion.
Tools and Preparation
To create these delightful Mini Lemon Cheesecake Tarts, you’ll need some essential tools. Having the right equipment will make the process smoother and more enjoyable.
Grab This Chef Knife Now - Almost Gone!
- Stays Razor-Sharp: Ice-hardened blade keeps its edge longer than ordinary knives
- Superior Grip Control: Unique finger hole design gives you perfect balance and safety
- Built to Last a Lifetime: Premium stainless steel blade with elegant beech wood handle
Customer Reviews ★★★★★
Essential Tools and Equipment
- Mixing bowl
- Whisk or electric mixer
- Measuring cups and spoons
- Muffin tin or tartlet pans
- Spatula
Importance of Each Tool
- Mixing bowl: A good mixing bowl allows you to combine ingredients thoroughly without spills.
- Whisk or electric mixer: This tool ensures that your cream cheese is smooth and blends well with other ingredients, creating that creamy texture.
- Muffin tin or tartlet pans: Using these helps shape the tarts consistently for a professional look.
Ingredients
Here’s what you’ll need to make these delicious Mini Lemon Cheesecake Tarts:
For the Crust
- 1 cup graham cracker crumbs (5 ounces, or 10 crackers crushed)
- 2 tablespoons granulated sugar
- 6 tablespoons unsalted butter (melted)
For the Filling
- 1 8-oz package cream cheese (softened)
- 1/2 cup sugar
- 2 teaspoons lemon zest (divided)
- 2 tablespoons lemon juice (freshly squeezed)
- 1/3 cup heavy whipping cream
- 1/4 teaspoon vanilla extract
For Garnish
- Fresh fruit or fruit preserves
How to Make Mini Lemon Cheesecake Tarts
Step 1: Prepare the Crust
- In a mixing bowl, combine graham cracker crumbs, granulated sugar, and melted butter.
- Mix until the mixture resembles wet sand.
- Press the mixture firmly into the bottom of muffin tins or tartlet pans to form an even layer.
Step 2: Make the Filling
- In another bowl, beat together cream cheese, sugar, lemon zest, and lemon juice. Mix until smooth.
- In a separate bowl, whip the heavy whipping cream until soft peaks form.
- Gently fold the whipped cream into the cream cheese mixture until fully combined.
Step 3: Assemble the Tarts
- Spoon the filling evenly into each crust.
- Smooth out the tops with a spatula if needed.
- Refrigerate for at least 2 hours to set.
Step 4: Garnish and Serve
- Before serving, add your choice of fresh fruit or fruit preserves on top of each tart.
- Serve chilled and enjoy!
These Mini Lemon Cheesecake Tarts are sure to become a favorite at your gatherings!
How to Serve Mini Lemon Cheesecake Tarts
Mini Lemon Cheesecake Tarts are delightful and versatile desserts that can be served in many ways. Here are some creative serving suggestions to make your tarts even more enjoyable.
Grab This Chef Knife Now - Almost Gone!
- Stays Razor-Sharp: Ice-hardened blade keeps its edge longer than ordinary knives
- Superior Grip Control: Unique finger hole design gives you perfect balance and safety
- Built to Last a Lifetime: Premium stainless steel blade with elegant beech wood handle
Customer Reviews ★★★★★
For a Refreshing Touch
- Fresh Berries: Top each tart with a mix of strawberries, blueberries, or raspberries for a burst of color and flavor.
- Mint Leaves: Add a sprig of fresh mint for an aromatic garnish that enhances the lemony taste.
As a Party Platter
- Mini Dessert Table: Arrange these tarts on a dessert table alongside other finger foods for a stunning display.
- Individual Servings: Place each tart in its own cupcake liner for easy serving and to keep them looking neat.
Pairing with Beverages
- Iced Tea: Serve mini tarts with sweetened iced tea for a refreshing drink pairing.
- Sparkling Water: Offer flavored sparkling water as a light beverage option to complement the tartness of the cheesecake.
For Special Occasions
- Birthday Celebrations: Use these tarts as a fun alternative to traditional birthday cake.
- Summer Picnics: Pack them in individual containers for a perfect picnic treat.

How to Perfect Mini Lemon Cheesecake Tarts
To ensure your Mini Lemon Cheesecake Tarts turn out perfectly every time, consider these helpful tips.
- Chill the Tarts Well: Allow the tarts to chill in the fridge for at least two hours. This helps set the filling and improves flavors.
- Use Fresh Ingredients: Fresh lemon juice and zest enhance the flavor significantly. Avoid bottled lemon juice if possible.
- Soften Cream Cheese Properly: Make sure the cream cheese is softened for easy mixing and a smooth filling texture.
- Adjust Sweetness: Taste your filling before pouring it into the crust. You can adjust sugar levels based on your preference.
- Garnish Just Before Serving: To maintain freshness, add fruits or preserves right before serving.
Best Side Dishes for Mini Lemon Cheesecake Tarts
Mini Lemon Cheesecake Tarts pair wonderfully with various side dishes that complement their sweet and tangy flavor. Here are some great options:
- Fruit Salad: A refreshing mix of seasonal fruits adds natural sweetness and balances the tartness.
- Savory Crostini: Lightly toasted bread topped with cream cheese and herbs provides a savory contrast to the sweet tarts.
- Mixed Nuts: A bowl of lightly salted mixed nuts offers crunch and pairs well without overwhelming flavors.
- Cheese Board: Include mild cheeses, such as brie or goat cheese, which pair nicely with desserts.
- Vegetable Platter: Crisp vegetables like cucumbers and bell peppers offer a crunchy contrast that refreshes the palate.
- Chocolate-Dipped Pretzels: The salty-sweet combination adds another layer of flavor that’s sure to please guests.
Common Mistakes to Avoid
Making Mini Lemon Cheesecake Tarts can be simple, but it’s easy to make mistakes. Here are some common pitfalls to watch out for.
- Skipping the Cream Cheese Softening: Using cold cream cheese can lead to lumps in your filling. Always soften it at room temperature before mixing.
- Overmixing the Filling: Overmixing can introduce too much air and cause cracks. Mix just until combined for a smooth texture.
- Not Measuring Ingredients Accurately: Accurate measurements ensure balanced flavors. Use a kitchen scale or measuring cups for precision.
- Ignoring Chilling Time: Rushing the chilling process may result in a runny tart. Allow them enough time to set properly in the fridge.
- Using Unsweetened Whipped Cream: Sweetened whipped cream enhances flavor and balances tartness. Always sweeten your cream before folding it into the mixture.

Storage & Reheating Instructions
Refrigerator Storage
- Store in an airtight container.
- Keep in the fridge for up to 5 days.
Freezing Mini Lemon Cheesecake Tarts
- Wrap each tart in plastic wrap and then place them in a freezer-safe container.
- Freeze for up to 2 months.
Reheating Mini Lemon Cheesecake Tarts
- Oven: Preheat oven to 300°F (150°C) and heat tarts for about 10 minutes.
- Microwave: Heat one tart at a time on low power for 15-20 seconds.
- Stovetop: Place tarts in a skillet over low heat, covered, for about 5 minutes.
Frequently Asked Questions
Here are some common questions about making Mini Lemon Cheesecake Tarts.
Can I use store-bought crusts for Mini Lemon Cheesecake Tarts?
Yes, you can use store-bought graham cracker crusts to save time. Just ensure they fit your tart molds.
How do I customize my Mini Lemon Cheesecake Tarts?
You can add different zests like lime or orange, or top them with various fruits like berries or kiwi for a fun twist!
What should I serve with Mini Lemon Cheesecake Tarts?
They pair wonderfully with fresh fruit, whipped cream, or even a light berry sauce for added flavor.
How long do Mini Lemon Cheesecake Tarts last?
When stored properly, they last up to 5 days in the refrigerator and up to 2 months if frozen.
Final Thoughts
Mini Lemon Cheesecake Tarts are not only delightful but also versatile! Their tangy flavor makes them perfect for any occasion, from picnics to dinner parties. Feel free to customize them with your favorite toppings and share this charming treat with loved ones!
Did You Enjoy Making This Recipe? Please rate this recipe with ⭐⭐⭐⭐⭐ or leave a comment.
📖 Recipe Card
PrintMini Lemon Cheesecake Tarts

Mini Lemon Cheesecake Tarts are a delightful balance of sweetness and tanginess, perfect for any occasion. These no-bake tarts feature a creamy lemon filling nestled in a crunchy graham cracker crust, making them both irresistible and easy to prepare. Ideal for spring gatherings or summer barbecues, they can be customized with fresh fruits for an extra touch of flavor and elegance. Impress your guests with these charming bite-sized desserts that not only taste amazing but also look stunning on any dessert table.
- Prep Time: 20 minutes
- Cook Time: N/A
- Total Time: 0 hours
- Yield: Makes about 12 mini tarts 1x
- Category: Dessert
- Method: No-bake
- Cuisine: American
Ingredients
- 1 cup graham cracker crumbs
- 2 tablespoons granulated sugar
- 6 tablespoons unsalted butter (melted)
- 1 package (8 oz) cream cheese (softened)
- 1/2 cup sugar
- 2 teaspoons lemon zest
- 2 tablespoons fresh lemon juice
- 1/3 cup heavy whipping cream
- Fresh fruit or preserves for garnish
Instructions
- Prepare the crust by mixing graham cracker crumbs, sugar, and melted butter in a bowl until it resembles wet sand. Press the mixture into muffin tins or tartlet pans.
- For the filling, beat together cream cheese, sugar, lemon zest, and lemon juice until smooth. In another bowl, whip heavy cream to soft peaks and gently fold it into the cream cheese mixture.
- Spoon the filling into each crust and refrigerate for at least 2 hours to set.
- Garnish with fresh fruit or preserves before serving chilled.
Nutrition
- Serving Size: 1 serving
- Calories: 180
- Sugar: 10g
- Sodium: 120mg
- Fat: 11g
- Saturated Fat: 7g
- Unsaturated Fat: 4g
- Trans Fat: 0g
- Carbohydrates: 16g
- Fiber: 0g
- Protein: 2g
- Cholesterol: 30mg