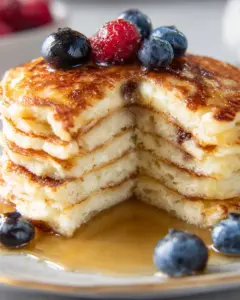
Having a good icing recipe that hardens is essential for any baking enthusiast, especially during the holidays. This Sugar Cookie Icing That Hardens not only sets perfectly but also adds a delightful finish to your sugar cookies. Whether for Christmas, birthdays, or any festive occasion, this icing will elevate your cookie decorating game and ensure your creations look stunning.

Jump to:
- Why You’ll Love This Recipe
- Tools and Preparation
- Essential Tools and Equipment
- Importance of Each Tool
- Ingredients
- For the Icing
- How to Make Sugar Cookie Icing That Hardens
- Step 1: Combine Dry Ingredients
- Step 2: Mix Until Smooth
- Step 3: Color Your Icing
- Step 4: Decorate Your Cookies
- How to Serve Sugar Cookie Icing That Hardens
- For Holiday Gatherings
- At Kids’ Parties
- For Family Treats
- During Festive Events
- How to Perfect Sugar Cookie Icing That Hardens
- Best Side Dishes for Sugar Cookie Icing That Hardens
- Common Mistakes to Avoid
- Storage & Reheating Instructions
- Refrigerator Storage
- Freezing Sugar Cookie Icing That Hardens
- Reheating Sugar Cookie Icing That Hardens
- Frequently Asked Questions
- Can I use regular food coloring instead of gel?
- How long does it take for sugar cookie icing to harden?
- Can I make this icing ahead of time?
- Does sugar cookie icing that hardens taste good?
- What if my icing doesn’t harden?
- Final Thoughts
- 📖 Recipe Card
Why You’ll Love This Recipe
- Quick and Easy: With just five simple ingredients, you can whip this icing up in minutes.
- Perfectly Hardens: This icing dries firm enough to stack cookies without smudging the designs.
- Versatile Flavors: Customize your icing with different extracts or colors to match any occasion.
- Fun for All Ages: Decorating with this icing is a fun activity for kids and adults alike during holiday gatherings.
- No Special Equipment Needed: You can make this icing using everyday kitchen tools.
Tools and Preparation
Before diving into the recipe, gather your tools. Having everything ready will make the process smooth and enjoyable.
Grab This Chef Knife Now - Almost Gone!

- Stays Razor-Sharp: Ice-hardened blade keeps its edge longer than ordinary knives
- Superior Grip Control: Unique finger hole design gives you perfect balance and safety
- Built to Last a Lifetime: Premium stainless steel blade with elegant beech wood handle
Customer Reviews ★★★★★
Essential Tools and Equipment
Importance of Each Tool
- Mixing bowl: Essential for combining all ingredients without spills.
- Sifter: Ensures that your powdered sugar is lump-free, leading to a smoother icing texture.
- Whisk or spoon: Necessary for mixing until you achieve the desired consistency.
Ingredients
To create the perfect Sugar Cookie Icing That Hardens, you will need:
For the Icing
- 2 cups powdered sugar
- 1 & 1/2 tbsp corn syrup
- 1/2 tsp vanilla extract
- 1 & 1/2 tbsp milk or water (cold)
- gel food coloring
How to Make Sugar Cookie Icing That Hardens
Follow these simple steps to create your own batch of hardening sugar cookie icing.
Step 1: Combine Dry Ingredients
- Sift the powdered sugar into a medium/large bowl. This helps eliminate lumps for a smoother icing.
- Add in the corn syrup, vanilla extract, and milk or water.
Step 2: Mix Until Smooth
- Stir vigorously until all ingredients are well combined and smooth. The mixture should be thick yet pourable.
- If needed, add more milk gradually until reaching your desired consistency.
Step 3: Color Your Icing
- Divide the icing into smaller bowls if you wish to make multiple colors.
- Add gel food coloring to each bowl and mix until you achieve vibrant shades.
Step 4: Decorate Your Cookies
- Use the icing immediately to decorate your cookies as desired.
- Allow the icing to set at room temperature before storing cookies in an airtight container.
Prep Time: 5 minutes
Total Time: 5 minutes
Course: Dessert
Cuisine: American
Grab This Chef Knife Now - Almost Gone!
- Stays Razor-Sharp: Ice-hardened blade keeps its edge longer than ordinary knives
- Superior Grip Control: Unique finger hole design gives you perfect balance and safety
- Built to Last a Lifetime: Premium stainless steel blade with elegant beech wood handle
Customer Reviews ★★★★★
How to Serve Sugar Cookie Icing That Hardens
Serving sugar cookie icing that hardens is all about creativity and presentation. Here are some fun and festive ways to serve your beautifully decorated cookies.
For Holiday Gatherings
- Cookie Platters: Arrange your decorated cookies on a large platter for a beautiful centerpiece.
- Gift Boxes: Package cookies in decorative boxes or tins as thoughtful gifts for friends and family.
At Kids’ Parties
- Decorating Station: Set up a station with plain sugar cookies and various colors of icing, allowing kids to create their own designs.
- Snack Table: Provide an assortment of cookies along with fun toppings for kids to enjoy while decorating.
For Family Treats
- Movie Night Snack: Serve the iced cookies alongside popcorn during family movie nights for a sweet treat.
- Holiday Breakfast: Include these cookies as part of a festive breakfast spread during the holidays.
During Festive Events
- Potlucks: Bring your decorated sugar cookies to potlucks; they’re sure to be a hit among guests.
- Cookie Exchanges: Share your unique icing creations at cookie exchange events for everyone to enjoy.

How to Perfect Sugar Cookie Icing That Hardens
Perfecting your sugar cookie icing that hardens takes practice. Here are some tips to help you achieve the best results.
- Flavor: Use pure vanilla extract for a richer taste in your icing.
- Right Consistency: Adjust the thickness by adding more milk or water until it flows smoothly off the spoon.
- Color Wisely: When using gel food coloring, start with small amounts and gradually add more for desired vibrancy.
- Allow Drying Time: Let your iced cookies dry completely at room temperature before stacking or packaging them.
- Experiment with Techniques: Try flooding techniques for even coverage or piping outlines for detail.
- Store Properly: Keep iced cookies in an airtight container at room temperature to maintain their firmness.
Best Side Dishes for Sugar Cookie Icing That Hardens
While sugar cookie icing that hardens is delightful on its own, pairing it with side dishes can elevate any occasion. Here are some great options:
- Fruit Salad: A refreshing mix of seasonal fruits provides a light contrast to sweet cookies.
- Cheese Platter: Include a variety of cheeses and crackers; the savory flavors complement the sweetness of the cookies well.
- Hot Chocolate Bar: Offer rich hot chocolate with toppings like whipped cream and peppermint sticks alongside your iced treats.
- Mini Cupcakes: These bite-sized desserts add another layer of sweetness and visual appeal next to your cookies.
- Nut Mixes: A selection of spiced nuts can provide a crunchy texture that balances the soft, sweet cookies.
- Veggie Tray: Fresh vegetables with dip can make for a healthier option while still being festive and colorful.
Common Mistakes to Avoid
Making Sugar Cookie Icing That Hardens can be tricky. Here are some common mistakes that may hinder your success.
- Incorrect Consistency: If your icing is too thick, it won’t spread well; if too thin, it won’t hold its shape. Aim for a smooth, flowing consistency.
- Skipping Sifting: Not sifting powdered sugar can lead to lumps in your icing. Always sift before mixing to ensure a smooth texture.
- Using Warm Ingredients: Using warm water or milk can affect the icing’s ability to harden. Always use cold liquids for the best results.
- Inadequate Drying Time: Not allowing enough time for the icing to set can ruin your designs. Let the cookies sit at room temperature until completely dry.
- Neglecting Color Mixing: Adding gel food coloring directly to your batch without testing can result in unexpected hues. Always mix colors gradually for desired shades.

Storage & Reheating Instructions
Refrigerator Storage
- Store leftover icing in an airtight container in the refrigerator.
- It will last up to one week; however, fresh icing is always best.
Freezing Sugar Cookie Icing That Hardens
- Freeze icing in small portions using ice cube trays or freezer-safe bags.
- Properly sealed, it can last up to three months.
Reheating Sugar Cookie Icing That Hardens
- Oven: Place in a microwave-safe dish and warm at low heat, stirring occasionally.
- Microwave: Heat in short bursts of 10-15 seconds, stirring after each interval until smooth.
- Stovetop: Use a double boiler method to gently reheat while stirring continuously.
Frequently Asked Questions
Here are some frequently asked questions about making Sugar Cookie Icing That Hardens.
Can I use regular food coloring instead of gel?
Regular food coloring may alter the consistency of your icing. Gel food coloring is recommended as it doesn’t thin out the icing.
How long does it take for sugar cookie icing to harden?
Typically, sugar cookie icing takes about 1-2 hours to dry on the surface but may take longer for thorough hardening depending on humidity.
Can I make this icing ahead of time?
Yes! You can prepare the icing ahead and store it in an airtight container in the fridge or freeze it for later use.
Does sugar cookie icing that hardens taste good?
Absolutely! This icing has a delightful sweetness with a hint of vanilla that complements sugar cookies perfectly.
What if my icing doesn’t harden?
If your icing isn’t hardening, check the consistency; it might be too thin. Add more powdered sugar and allow ample drying time at room temperature.
Final Thoughts
This Sugar Cookie Icing That Hardens recipe is perfect for all occasions, especially during holidays. Its versatility allows you to customize colors and designs to suit any theme. Try experimenting with different shades and decorations to make your cookies uniquely yours!
Did You Enjoy Making This Recipe? Please rate this recipe with ⭐⭐⭐⭐⭐ or leave a comment.
📖 Recipe Card
PrintSugar Cookie Icing That Hardens

Create perfect sugar cookies this holiday season with our easy Sugar Cookie Icing That Hardens recipe! This delightful icing not only enhances the visual appeal of your cookies but also dries firm enough to stack without smudging. Made with just a handful of simple ingredients, it’s quick to prepare and allows for endless customization through colors and flavors.
- Prep Time: 5 minutes
- Cook Time: None
- Total Time: 0 hours
- Yield: Approximately 12 servings (12 tablespoons) 1x
- Category: Dessert
- Method: N/A
- Cuisine: American
Ingredients
- 2 cups powdered sugar
- 1 ½ tbsp corn syrup
- ½ tsp vanilla extract
- 1 ½ tbsp cold milk or water
- Gel food coloring
Instructions
- In a large mixing bowl, sift the powdered sugar to remove lumps.
- Add corn syrup, vanilla extract, and cold milk or water. Mix vigorously until smooth and thick yet pourable.
- For color variations, divide icing into bowls and mix in gel food coloring until desired shades are achieved.
- Use immediately to decorate your cookies; allow them to set at room temperature before storing.
Nutrition
- Serving Size: 1 tbsp (15g)
- Calories: 60
- Sugar: 14g
- Sodium: 0mg
- Fat: 0g
- Saturated Fat: 0g
- Unsaturated Fat: 0g
- Trans Fat: 0g
- Carbohydrates: 15g
- Fiber: 0g
- Protein: 0g
- Cholesterol: 0mg