Homemade Lemon Crumb Bars are the perfect treat for any occasion, whether it’s a sunny picnic or a cozy family dessert night. With their creamy, tangy lemon filling nestled between a buttery brown sugar crust and a crumbly oat topping, these bars deliver an irresistible flavor and texture. Easy to make and even easier to love, they are sure to impress your guests and become a favorite in your dessert repertoire.

Jump to:
- Why You’ll Love This Recipe
- Tools and Preparation
- Essential Tools and Equipment
- Importance of Each Tool
- Ingredients
- For the Crust and Topping:
- For the Lemon Filling:
- How to Make Homemade Lemon Crumb Bars
- Step 1: Preheat the Oven
- Step 2: Make the Crust & Topping
- Step 3: Form the Crust
- Step 4: Prepare the Lemon Filling
- Step 5: Assemble & Bake
- Step 6: Cool & Serve
- How to Serve Homemade Lemon Crumb Bars
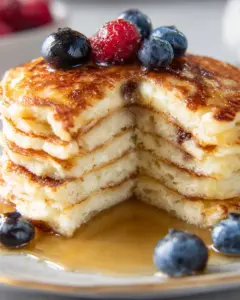
- Pair with Fresh Berries
- Top with Whipped Cream
- Serve with Ice Cream
- Dust with Powdered Sugar
- How to Perfect Homemade Lemon Crumb Bars
- Best Side Dishes for Homemade Lemon Crumb Bars
- Common Mistakes to Avoid
- Storage & Reheating Instructions
- Refrigerator Storage
- Freezing Homemade Lemon Crumb Bars
- Reheating Homemade Lemon Crumb Bars
- Frequently Asked Questions
- Can I use frozen lemons for the filling?
- How do I know when my bars are done baking?
- Can I substitute other fruits?
- What is the best way to serve these bars?
- Final Thoughts
- 📖 Recipe Card
Why You’ll Love This Recipe
- Quick and Simple: These bars come together in just 45 minutes, making them a go-to recipe for last-minute gatherings.
- Delicious Flavor: The combination of creamy lemon filling and buttery crust creates a delightful taste that’s hard to resist.
- Versatile Dessert: Perfect for potlucks, parties, or just because—these bars fit any occasion.
- Make-Ahead Friendly: They can be prepared in advance and stored, ensuring you always have a sweet treat on hand.
- Customizable Options: Feel free to experiment with different toppings or crusts, like using graham crackers instead of oats for a twist.
Tools and Preparation
Before diving into making Homemade Lemon Crumb Bars, it’s essential to gather the right tools. Having everything ready will streamline the process and ensure your baking is a success.
Grab This Chef Knife Now - Almost Gone!
- Stays Razor-Sharp: Ice-hardened blade keeps its edge longer than ordinary knives
- Superior Grip Control: Unique finger hole design gives you perfect balance and safety
- Built to Last a Lifetime: Premium stainless steel blade with elegant beech wood handle
Customer Reviews ★★★★★
Essential Tools and Equipment
- 8×8-inch baking pan
- Mixing bowls (medium and large)
- Whisk
- Measuring cups and spoons
- Parchment paper or foil
- Nonstick spray
Importance of Each Tool
- Baking Pan: A sturdy 8×8-inch pan ensures even cooking for your crumb bars.
- Mixing Bowls: Using separate bowls helps keep dry ingredients from mixing with wet ones until you’re ready.
- Whisk: A good whisk makes it easy to combine ingredients smoothly, especially for the lemon filling.
Ingredients
For the Crust and Topping:
- 1 cup all-purpose flour
- 1 cup old-fashioned oats
- 1/4 teaspoon salt
- 3/4 teaspoon baking soda
- 10 tablespoons unsalted butter, melted
- 1/2 cup light brown sugar, packed
- 1 teaspoon pure vanilla extract
For the Lemon Filling:
- 1 (14 oz) can sweetened condensed milk
- 2 tablespoons sour cream (or plain yogurt)
- 1 large egg yolk
- 1/4 cup freshly squeezed lemon juice
- 1 tablespoon finely grated lemon zest
- 1/2 teaspoon vanilla extract

How to Make Homemade Lemon Crumb Bars
Step 1: Preheat the Oven
Preheat the oven to 350°F (175°C). Line an 8×8-inch baking pan with foil or parchment paper, leaving an overhang on two sides for easy removal. Spray with nonstick spray.
Step 2: Make the Crust & Topping
In a medium bowl, whisk together the flour, oats, salt, and baking soda. In a separate large bowl, whisk the melted butter, brown sugar, and vanilla extract for at least 1 minute until fully combined. Stir the dry ingredients into the wet ingredients until well mixed.
Step 3: Form the Crust
Remove about 3/4 cup of the mixture and set aside for the crumb topping. Press the remaining dough evenly into the prepared pan. It will be very buttery—that’s okay! Bake for 10 minutes.
Grab This Chef Knife Now - Almost Gone!
- Stays Razor-Sharp: Ice-hardened blade keeps its edge longer than ordinary knives
- Superior Grip Control: Unique finger hole design gives you perfect balance and safety
- Built to Last a Lifetime: Premium stainless steel blade with elegant beech wood handle
Customer Reviews ★★★★★
Step 4: Prepare the Lemon Filling
While the crust bakes, whisk together the sweetened condensed milk, sour cream, egg yolk, lemon juice, lemon zest, and vanilla extract in a bowl until smooth.
Step 5: Assemble & Bake
Pour the lemon filling over the warm crust and spread it evenly. Be gentle as the crust is still soft. Crumble the reserved dough over the filling. Bake for 17-20 minutes or until the top is lightly golden and filling is set.
Step 6: Cool & Serve
Place the pan on a wire rack to cool completely. Once fully cooled, use the parchment or foil overhang to lift out of the pan. Slice into squares and enjoy!
How to Serve Homemade Lemon Crumb Bars
Homemade Lemon Crumb Bars are a delightful treat that can be enjoyed in various ways. Whether you want to impress guests at a gathering or simply indulge during a cozy night in, here are some serving suggestions to elevate your experience.
Pair with Fresh Berries
- Blueberries: Their sweetness complements the tartness of the lemon filling perfectly.
- Raspberries: Add a pop of color and a tangy flavor that balances beautifully with the bars.
Top with Whipped Cream
- Light and Fluffy: A dollop of freshly whipped cream adds creaminess and enhances the overall dessert experience.
- Flavored Options: Consider adding vanilla or lemon zest to the whipped cream for an extra zing.
Serve with Ice Cream
- Vanilla Ice Cream: The classic choice; its creamy texture pairs wonderfully with the crumb bars.
- Lemon Sorbet: For a refreshing twist, lemon sorbet enhances the citrus flavor without overwhelming it.
Dust with Powdered Sugar
- Simple Elegance: A light dusting of powdered sugar adds visual appeal and sweetness without overpowering the flavors.
How to Perfect Homemade Lemon Crumb Bars
Perfecting your Homemade Lemon Crumb Bars involves attention to detail and a few helpful tips. Follow these guidelines to ensure your bars are always a hit!
- Use Fresh Lemons: Freshly squeezed lemon juice and zest provide vibrant flavor compared to bottled alternatives.
- Don’t Overmix the Filling: Mix just until combined; overmixing can incorporate too much air, affecting the texture.
- Cool Completely Before Slicing: Allowing the bars to cool ensures cleaner cuts and helps them hold their shape better.
- Adjust Sweetness if Needed: Taste before baking; if you prefer sweeter bars, add a bit more sugar to the filling.
- Experiment with Toppings: Try adding coconut flakes or chopped nuts on top for added texture and flavor contrast.

Best Side Dishes for Homemade Lemon Crumb Bars
While these bars are delicious on their own, pairing them with complementary side dishes can enhance any occasion. Here are some great options:
- Fruit Salad: A medley of seasonal fruits brings freshness and balances out the richness of the bars.
- Cheese Platter: Soft cheeses like goat cheese or ricotta create a delightful contrast in flavors and textures.
- Mint Tea: This refreshing drink cleanses the palate and complements the lemon’s brightness.
- Pistachio Cookies: Their nutty flavor pairs wonderfully with lemon desserts for an interesting bite.
- Coconut Macaroons: Chewy and sweet, macaroons add another layer of flavor that works well with lemon bars.
- Greek Yogurt Parfait: Layered with granola and fruit, this dish offers creaminess that beautifully contrasts with crunchy crumbs.
Common Mistakes to Avoid
When making Homemade Lemon Crumb Bars, it’s easy to overlook some key steps. Here are common mistakes to avoid for the best results.
- Incorrect oven temperature: Always preheat your oven to 350°F (175°C) before baking. An unheated oven can lead to uneven cooking.
- Not cooling the crust: Let the crust cool slightly before adding the lemon filling. This helps prevent the filling from sinking into the crust.
- Skipping the zest: Don’t forget lemon zest! It adds a fresh, vibrant flavor that enhances your bars.
- Overmixing ingredients: Mix only until combined when making the crust and topping. Overmixing can make them tough instead of crumbly.
- Using old ingredients: Ensure your baking soda is fresh. Expired baking soda can affect how well your bars rise and set.
Storage & Reheating Instructions
Refrigerator Storage
- Store Homemade Lemon Crumb Bars in an airtight container.
- They will stay fresh for up to 5 days in the refrigerator.
Freezing Homemade Lemon Crumb Bars
- Wrap each bar tightly in plastic wrap or aluminum foil.
- Place them in a freezer-safe container or bag for up to 3 months.
Reheating Homemade Lemon Crumb Bars
- Oven: Preheat your oven to 350°F (175°C). Place bars on a baking sheet and reheat for about 10 minutes.
- Microwave: Heat individual bars on a microwave-safe plate for about 15-20 seconds. Watch closely to avoid overheating.
- Stovetop: Use a skillet over low heat, cover with a lid, and warm for a few minutes until heated through.

Frequently Asked Questions
Here are some common questions about making Homemade Lemon Crumb Bars.
Can I use frozen lemons for the filling?
Yes, you can use frozen lemon juice or zest if you don’t have fresh lemons available. Just ensure it’s fully thawed before using.
How do I know when my bars are done baking?
The tops should be lightly golden, and the filling should be set but slightly jiggly when you gently shake the pan.
Can I substitute other fruits?
Definitely! You can replace lemons with limes or oranges for a different flavor profile in these crumb bars.
What is the best way to serve these bars?
Dust with powdered sugar just before serving for an extra touch of sweetness and presentation!
Final Thoughts
Homemade Lemon Crumb Bars are a delightful treat that balances tangy lemon flavor with a buttery crumble. They’re perfect for any occasion and easy to customize with different citrus fruits or toppings. Don’t hesitate to give this recipe a try; your friends and family will love them!
Did You Enjoy Making This Recipe? Please rate this recipe with ⭐⭐⭐⭐⭐ or leave a comment.
📖 Recipe Card
PrintHomemade Lemon Crumb Bars

Homemade Lemon Crumb Bars are the ultimate dessert for any occasion, combining a creamy, tangy lemon filling with a buttery brown sugar crust and a delightful crumbly oat topping. These bars are not only easy to make, coming together in just 45 minutes, but they also promise to impress anyone who takes a bite. Perfect for potlucks, parties, or a cozy night in, they are a refreshing treat that will have your friends and family coming back for more. With options to customize toppings and serve alongside fresh berries or whipped cream, these bars are sure to become a favorite in your dessert repertoire.
- Prep Time: 15 minutes
- Cook Time: 30 minutes
- Total Time: 45 minutes
- Yield: Approximately 16 servings 1x
- Category: Dessert
- Method: Baking
- Cuisine: American
Ingredients
- 1 cup all-purpose flour
- 1 cup old-fashioned oats
- 1/4 teaspoon salt
- 3/4 teaspoon baking soda
- 10 tablespoons unsalted butter, melted
- 1/2 cup light brown sugar, packed
- 1 teaspoon pure vanilla extract
- 1 (14 oz) can sweetened condensed milk
- 2 tablespoons sour cream (or plain yogurt)
- 1 large egg yolk
- 1/4 cup freshly squeezed lemon juice
- 1 tablespoon finely grated lemon zest
- 1/2 teaspoon vanilla extract
Instructions
- Preheat the oven to 350°F (175°C). Line an 8×8-inch baking pan with parchment paper and spray with nonstick spray.
- In a medium bowl, whisk together flour, oats, salt, and baking soda. In a separate bowl, mix melted butter with brown sugar and vanilla until combined. Stir in dry ingredients.
- Set aside 3/4 cup of the mixture for topping; press the rest into the pan. Bake for 10 minutes.
- Meanwhile, whisk together sweetened condensed milk, sour cream, egg yolk, lemon juice, lemon zest, and vanilla until smooth.
- Pour lemon filling over warm crust and crumble reserved mixture on top. Bake for an additional 17-20 minutes until golden.
- Cool completely before cutting into squares.
Nutrition
- Serving Size: 1 serving
- Calories: 205
- Sugar: 12g
- Sodium: 90mg
- Fat: 11g
- Saturated Fat: 7g
- Unsaturated Fat: 3g
- Trans Fat: 0g
- Carbohydrates: 25g
- Fiber: 1g
- Protein: 3g
- Cholesterol: 35mg