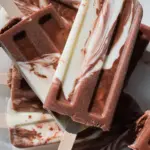
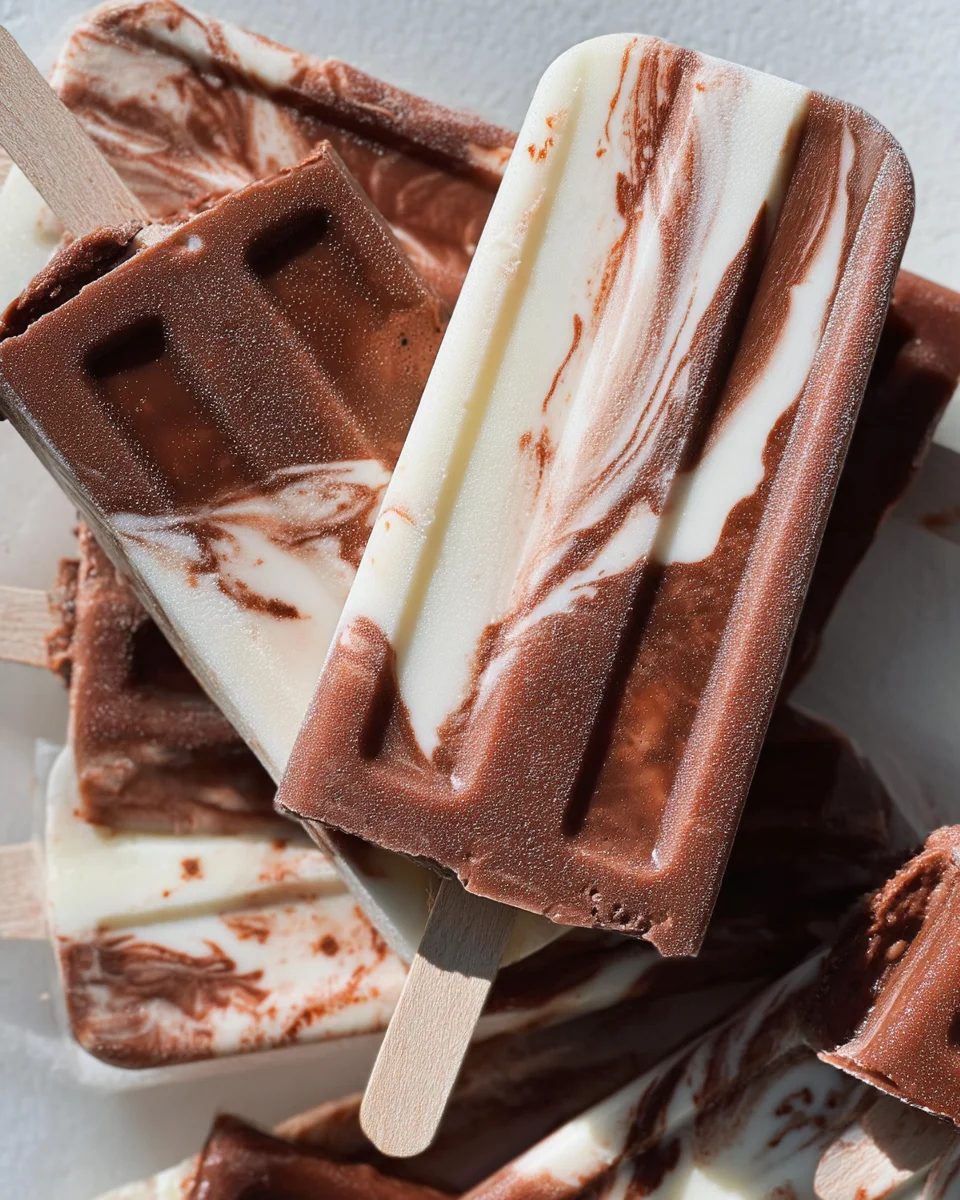
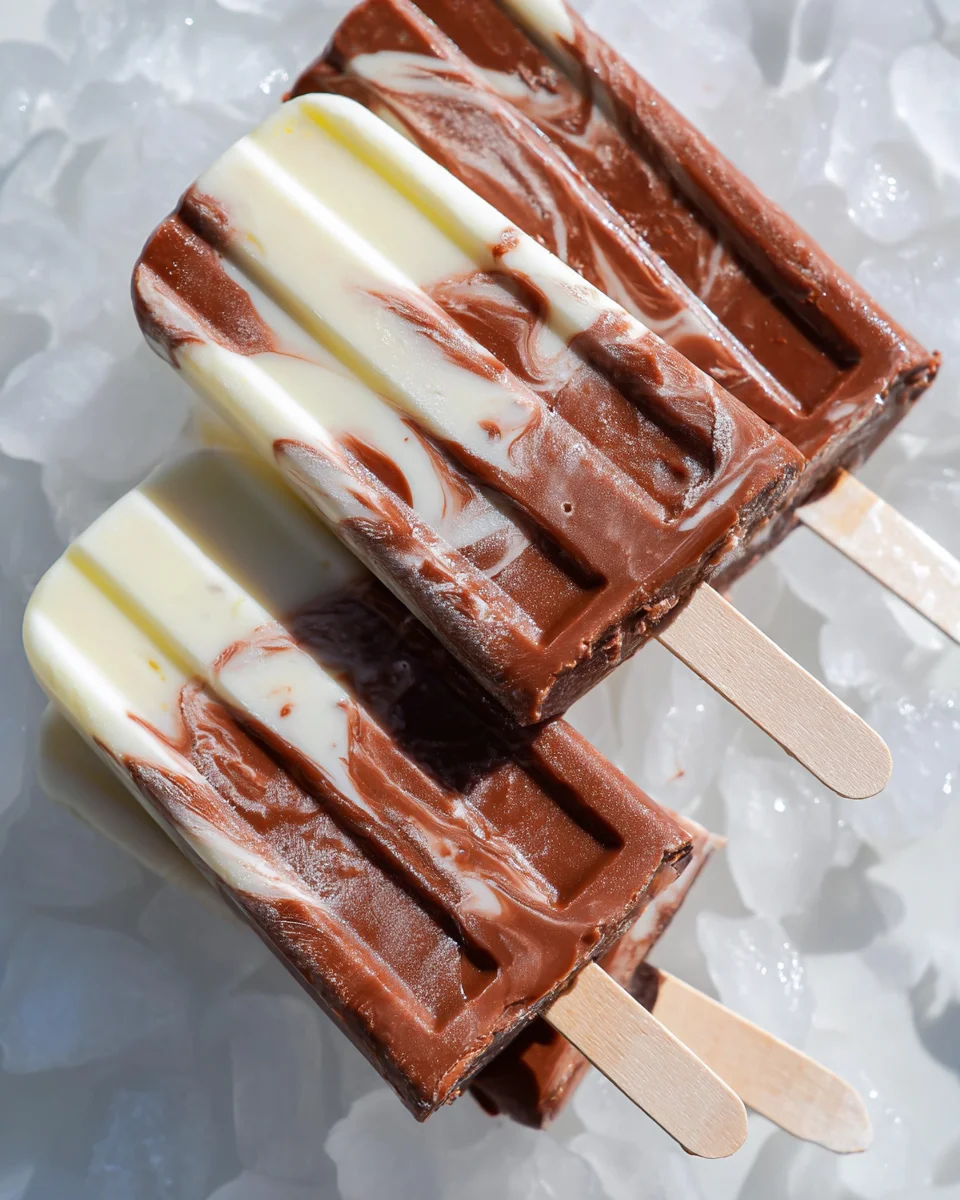
These delightful Jello Pudding Pops are a perfect frozen treat that brings back memories of childhood summers. With their creamy texture and the delicious combination of chocolate and white chocolate (or vanilla), they make for an irresistible snack on hot days or any time you crave something sweet. Not only are these pops easy to create at home, but they also allow for endless customization to suit your taste. Enjoy them at birthday parties, family gatherings, or simply as a refreshing dessert!
Jump to:
- Why You’ll Love This Recipe
- Tools and Preparation
- Essential Tools and Equipment
- Importance of Each Tool
- Ingredients
- For the Pudding Mixtures
- How to Make Jello Pudding Pops
- Step 1: Prepare the White Chocolate Pudding
- Step 2: Prepare the Chocolate Pudding
- Step 3: Combine the Puddings
- Step 4: Fill the Molds
- Step 5: Freeze
- Step 6: Serve Your Popsicles
- How to Serve Jello Pudding Pops
- Individual Cups
- Dessert Platter
- Birthday Parties
- Ice Cream Bar
- Summer BBQs
- Movie Night Treat
- How to Perfect Jello Pudding Pops
- Best Side Dishes for Jello Pudding Pops
- Common Mistakes to Avoid
- Refrigerator Storage
- Freezing Jello Pudding Pops
- Reheating Jello Pudding Pops
- Frequently Asked Questions
- What are Jello Pudding Pops made of?
- How do I customize my Jello Pudding Pops?
- Can I use non-dairy milk for Jello Pudding Pops?
- How long do homemade pudding pops last?
- Final Thoughts
- 📖 Recipe Card
Why You’ll Love This Recipe
- Easy to Make: With just a few ingredients and simple steps, anyone can whip up these delicious treats.
- Customizable Flavors: Choose your favorite Jell-O pudding mixes and experiment with different flavor combinations.
- Perfect for Any Occasion: These pudding pops are suitable for summer BBQs, birthday parties, or just a casual treat at home.
- No Baking Required: Enjoy a delightful dessert without the hassle of an oven—just mix, freeze, and enjoy!
- Family-Friendly Fun: Involve kids in the preparation process for a fun kitchen activity that everyone will love.
Tools and Preparation
Before you dive into making your Jello Pudding Pops, gather the necessary tools. Having everything ready makes the process smooth and enjoyable.
Essential Tools and Equipment
- Popsicle molds
- Mixing bowls
- Whisk
- Gallon-size zip-top bag
Importance of Each Tool
- Popsicle molds: These are essential for shaping your pudding pops. They ensure uniform size and easy removal after freezing.
- Mixing bowls: Useful for combining ingredients without making a mess. Having multiple bowls allows you to prepare different flavors simultaneously.
- Whisk: A whisk ensures that your pudding mixes blend smoothly without lumps, resulting in creamier pops.
- Gallon-size zip-top bag: This is perfect for piping the pudding mixture into molds neatly. It minimizes mess and allows for beautiful swirls.
Ingredients
These creamy, old-fashioned Jello Pudding Pops are made with simple ingredients:
For the Pudding Mixtures
- 1 (3.3 oz) box White Chocolate Instant Jell-O Pudding Mix (or vanilla)
- 1 (3.3 oz) box Chocolate Instant Jell-O Pudding Mix
- 3½ cups whole milk, divided
How to Make Jello Pudding Pops
Step 1: Prepare the White Chocolate Pudding
In one medium bowl, whisk together the white chocolate pudding mix with 1¾ cups of milk until smooth. Let it thicken slightly.
Step 2: Prepare the Chocolate Pudding
In another medium bowl, whisk together the chocolate pudding mix with the remaining 1¾ cups of milk until smooth. Allow it to thicken slightly as well.
Step 3: Combine the Puddings
Once both puddings are beginning to set, spoon alternating scoops of each pudding into a gallon-size zip-top bag. Seal the bag and snip one of the corners.
Step 4: Fill the Molds
Pipe the pudding mixture into popsicle molds, allowing the two flavors to swirl together as you fill them.
Step 5: Freeze
Freeze for at least 3 hours or overnight for best results.
Step 6: Serve Your Popsicles
To remove the pudding pops from the molds, dip the bottoms of the molds in hot water for a few seconds until they slide out easily. Enjoy your homemade Jello Pudding Pops!
How to Serve Jello Pudding Pops
Jello Pudding Pops are a fun and refreshing dessert perfect for any occasion. Here are some creative ways to serve them that will impress your guests and make your summer gatherings even sweeter.
Individual Cups
- Serve each Jello Pudding Pop in a colorful cup for easy eating. This is great for parties or picnics.
Dessert Platter
- Arrange the pudding pops on a large platter with fresh fruit. Strawberries or blueberries add a burst of color and flavor.
Birthday Parties
- Use festive decorations around the pops, such as sprinkles or themed napkins, to make them stand out at birthday celebrations.
Ice Cream Bar
- Set up an ice cream bar with various toppings where guests can dip their Jello Pudding Pops in chocolate sauce or roll them in crushed nuts.
Summer BBQs
- Pair Jello Pudding Pops with grilled burgers and hot dogs for a classic summer cookout experience. They provide a cool contrast to the savory dishes.
Movie Night Treat
- Create a cozy movie night atmosphere by serving Jello Pudding Pops alongside popcorn and candy. They make for a delightful frozen snack while watching films.
How to Perfect Jello Pudding Pops
Creating the ideal Jello Pudding Pops requires some tips and techniques to elevate your dessert game. Follow these suggestions for the best results.
-
Use cold milk: Start with cold milk for both pudding mixes, which helps achieve a creamy texture.
-
Whisk thoroughly: Make sure to whisk the pudding mixes well until smooth to avoid lumps.
-
Alternate layers: When filling molds, alternate between chocolate and white chocolate puddings for a beautiful swirl effect.
-
Freeze longer: For firmer pops, freeze overnight instead of just three hours; this ensures they hold their shape better when served.
-
Warm mold technique: If you have trouble removing the pops from molds, dip them briefly in hot water—this makes it easier without melting the pops too much.
Best Side Dishes for Jello Pudding Pops
Jello Pudding Pops pair well with various side dishes that enhance their flavors and create a balanced meal. Here are some delightful options to consider:
-
Fruit Salad: A mix of seasonal fruits adds freshness and complements the creamy texture of pudding pops.
-
Mini Sandwiches: Delightful finger sandwiches filled with classic ingredients like ham or cucumber can balance the sweetness of the dessert.
-
Veggie Platter: Crisp vegetables served with hummus or ranch dressing offer a healthy crunch next to sweet treats.
-
Cheese Board: A selection of cheeses can create an interesting contrast to the sweetness of Jello Pudding Pops—try including brie and cheddar.
-
Potato Salad: Creamy potato salad provides comfort food vibes that work well with frozen desserts during summer gatherings.
-
Grilled Corn on the Cob: The sweetness of grilled corn enhances outdoor dining experiences, making it a perfect companion for pudding pops.
-
Chocolate Cake Bites: Small bites of chocolate cake can intensify flavors while being easy to munch on alongside your frozen treat.
-
Pasta Salad: A light pasta salad can round out your meal, providing a savory element that pairs nicely with rich desserts like Jello Pudding Pops.
Common Mistakes to Avoid
Making Jello Pudding Pops is simple, but a few common mistakes can lead to less than perfect results.
- Skipping the whisking step – Not whisking the pudding mix thoroughly with milk can lead to lumps. Make sure to whisk until completely smooth.
- Using the wrong molds – If your molds are too small, you’ll run out of space for swirling flavors. Choose larger molds for best results.
- Not freezing long enough – If you don’t freeze the pops for at least 3 hours, they may not hold their shape. Plan ahead and freeze them overnight for best results.
- Overfilling the molds – Filling the molds too full can cause spillage as they freeze. Leave a little space at the top for expansion.
- Neglecting to use hot water – If you’re struggling to remove the pops from their molds, dipping them in hot water will help loosen them quickly.
Refrigerator Storage
- Store leftover Jello Pudding Pops in an airtight container in the refrigerator for up to 2 days.
Freezing Jello Pudding Pops
- Keep Jello Pudding Pops in their molds or transfer them to a freezer-safe bag. They can be stored in the freezer for up to 2 months.
Reheating Jello Pudding Pops
Reheating is usually not necessary since these treats are enjoyed frozen, but if you want to soften them a bit:
- Oven – Preheat your oven to a low setting, then place pops on a baking sheet for a few minutes.
- Microwave – Use short bursts of low power (10-15 seconds) until they’re slightly softened.
- Stovetop – Fill a bowl with warm water and place the pops (still in their molds) for about 5-10 seconds.
Frequently Asked Questions
What are Jello Pudding Pops made of?
Jello Pudding Pops are made from instant pudding mix, milk, and often flavored with chocolate and white chocolate or vanilla.
How do I customize my Jello Pudding Pops?
You can customize your Jello Pudding Pops by adding fruits, sprinkles, or other flavorings to enhance your treat.
Can I use non-dairy milk for Jello Pudding Pops?
Yes! Non-dairy alternatives like almond or soy milk work well in making Jello Pudding Pops.
How long do homemade pudding pops last?
Homemade Jello Pudding Pops can last up to 2 months when stored properly in the freezer.
Final Thoughts
These creamy and delicious Jello Pudding Pops are not only easy to make but also incredibly versatile. You can customize them with different flavors or mix-ins based on your preferences. Perfect for summer days or anytime you crave a cool treat, give this recipe a try and enjoy making your frozen delights!
Did You Enjoy Making This Recipe? Please rate this recipe with ⭐⭐⭐⭐⭐ or leave a comment.
📖 Recipe Card
PrintJello Pudding Pops
Indulge in the nostalgia of summer with these delightful Jello Pudding Pops, a creamy frozen treat that combines rich chocolate and velvety white chocolate (or vanilla). Perfect for hot days, birthday parties, or simply satisfying your sweet tooth, these pops are easy to make and fully customizable to suit any flavor preference. With no baking required, you can whip them up in no time and enjoy a refreshing dessert that kids and adults alike will love!
- Prep Time: 15 minutes
- Cook Time: 0 minutes
- Total Time: 15 minutes
- Yield: Approximately 8 servings 1x
- Category: Dessert
- Method: No Bake
- Cuisine: American
Ingredients
- 1 (3.3 oz) box White Chocolate Instant Jell-O Pudding Mix (or vanilla)
- 1 (3.3 oz) box Chocolate Instant Jell-O Pudding Mix
- 3½ cups whole milk, divided
Instructions
- In a medium bowl, whisk together the white chocolate pudding mix and 1¾ cups of cold milk until smooth. Let thicken slightly.
- In another bowl, combine the chocolate pudding mix with the remaining 1¾ cups of cold milk, whisking until smooth and thickened.
- Spoon alternating scoops of each pudding into a gallon-size zip-top bag. Seal the bag and cut one corner.
- Pipe the mixture into popsicle molds, allowing for a beautiful swirl as you fill them.
- Freeze for at least 3 hours or overnight for best results.
- To serve, briefly dip the molds in hot water to loosen and slide out your pops.
Nutrition
- Serving Size: 1 serving
- Calories: 100
- Sugar: 15g
- Sodium: 70mg
- Fat: 2g
- Saturated Fat: 1g
- Unsaturated Fat: 0g
- Trans Fat: 0g
- Carbohydrates: 18g
- Fiber: 0g
- Protein: 2g
- Cholesterol: 5mg
