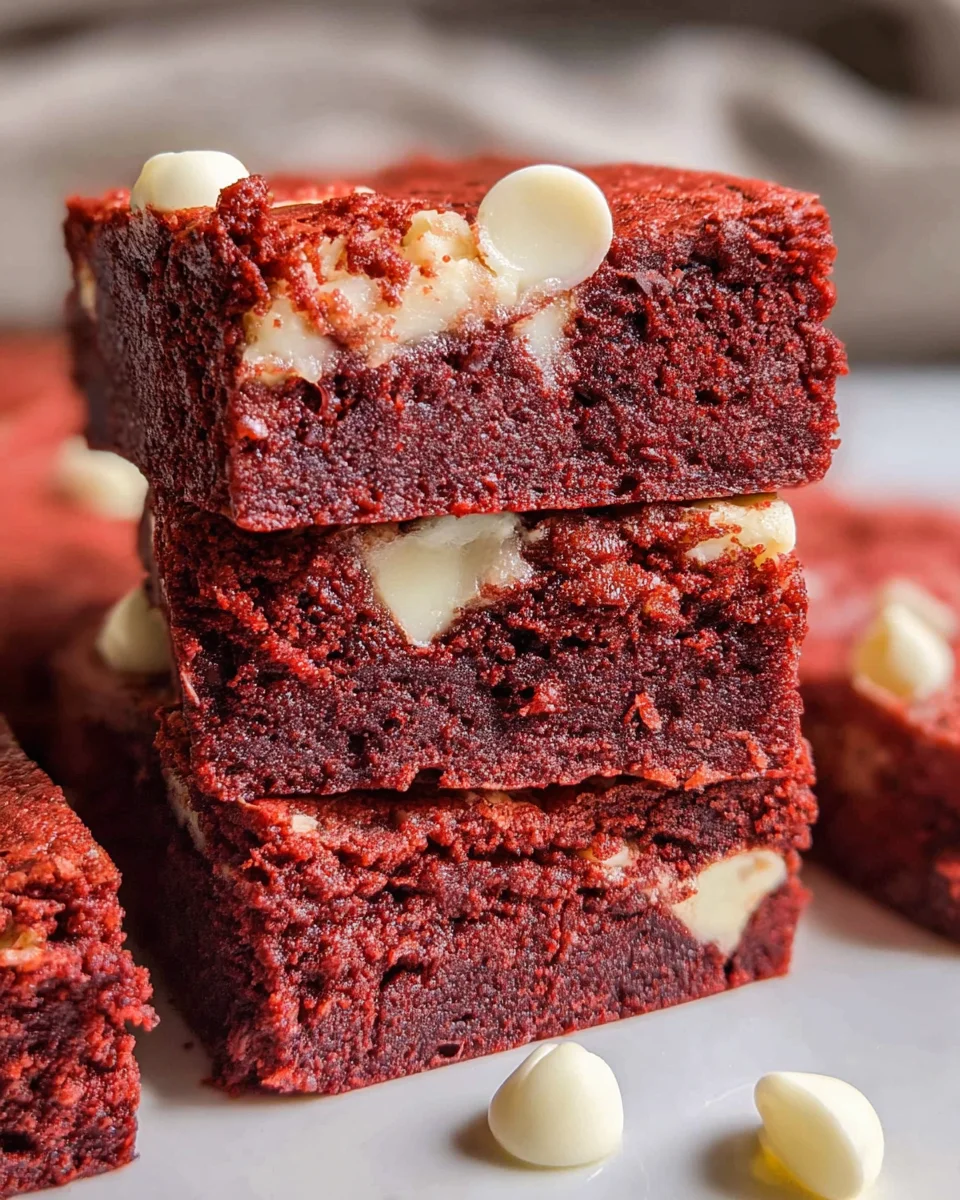
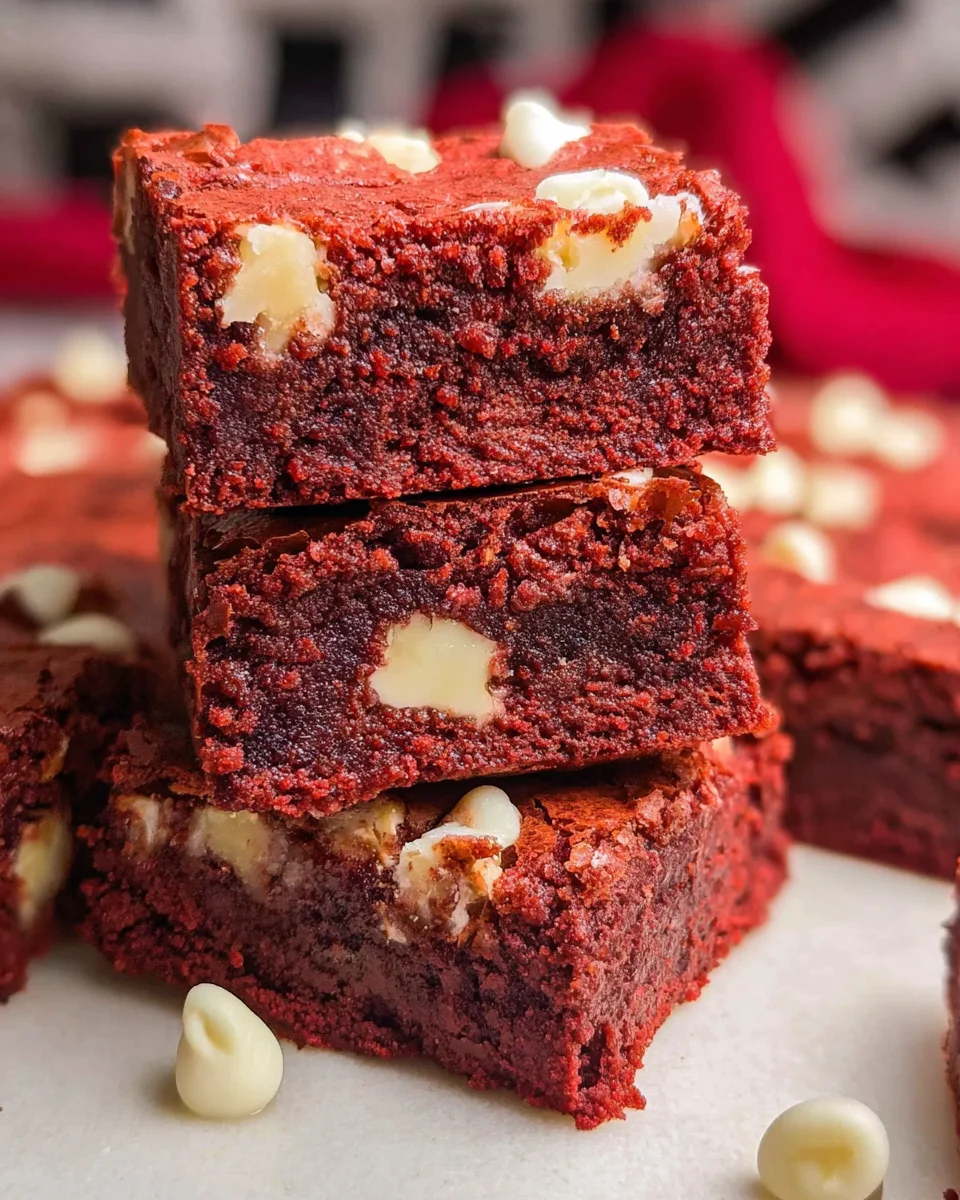
These delightful Red Velvet Brownies are the ultimate dessert for any occasion. With their rich, fudgy texture and a pop of vibrant red color, they are sure to impress friends and family alike. Perfect for holidays, parties, or simply when you have a sweet craving, these brownies combine the classic flavors of red velvet cake with the gooey goodness of brownies. Topped with sweet white chocolate chips, they offer a unique twist that makes them stand out from traditional desserts.
Jump to:
- Why You’ll Love This Recipe
- Tools and Preparation
- Essential Tools and Equipment
- Importance of Each Tool
- Ingredients
- How to Make Red Velvet Brownies
- Step 1: Preheat the Oven
- Step 2: Mix Wet Ingredients
- Step 3: Add Eggs & Flavorings
- Step 4: Incorporate Dry Ingredients
- Step 5: Add White Chocolate Chips
- Step 6: Bake
- Step 7: Cool & Serve
- How to Serve Red Velvet Brownies
- Pair with Ice Cream
- Drizzle with Sauce
- Top with Whipped Cream
- Serve Warm
- Garnish with Berries
- How to Perfect Red Velvet Brownies
- Best Side Dishes for Red Velvet Brownies
- Common Mistakes to Avoid
- Storage & Reheating Instructions
- Refrigerator Storage
- Freezing Red Velvet Brownies
- Reheating Red Velvet Brownies
- Frequently Asked Questions
- Can I use dark chocolate instead of cocoa powder?
- How do I achieve a deeper red color in my Red Velvet Brownies?
- Can I make these Red Velvet Brownies gluten-free?
- What is the best way to serve Red Velvet Brownies?
- How long do these brownies last?
- Final Thoughts
- 📖 Recipe Card
Why You’ll Love This Recipe
- Decadent Flavor: The combination of cocoa powder and white chocolate creates a rich taste that is hard to resist.
- Easy to Make: With simple ingredients and straightforward instructions, even novice bakers can enjoy success.
- Versatile Treat: These brownies are perfect for various occasions, from birthdays to Valentine’s Day celebrations.
- Eye-Catching Color: The bright red hue adds an impressive touch to any dessert table.
- Fudgy Texture: Each bite is soft and moist, making them incredibly satisfying.
Tools and Preparation
Before diving into this delicious recipe, ensure you have the right tools on hand. This will make your baking process smoother and more enjoyable.
Essential Tools and Equipment
Importance of Each Tool
- Baking Pan: A 9×9-inch pan provides the ideal size for evenly baked brownies.
- Parchment Paper: It prevents sticking and allows for easy removal after baking.
- Mixing Bowls: Using separate bowls helps keep ingredients organized as you prepare your batter.
- Rubber Spatula: This tool is perfect for folding in ingredients without overmixing.
Ingredients
- 12 tablespoons unsalted butter, melted
- 5 tablespoons unsweetened cocoa powder
- ½ teaspoon table salt
- 1¼ cups granulated sugar
- 3 eggs
- ¾ teaspoon vanilla extract
- ¾ teaspoon white vinegar
- 1 cup all-purpose flour
- 10–12 drops Wilton red food coloring (adjust to desired color)
- 1 cup white chocolate chips, divided
How to Make Red Velvet Brownies
Step 1: Preheat the Oven
Preheat your oven to 350°F (175°C). Line a 9×9-inch baking pan with parchment paper and lightly spray it with nonstick cooking spray.
Step 2: Mix Wet Ingredients
In a large bowl, whisk together the melted butter, cocoa powder, salt, and sugar until everything is fully combined.
Step 3: Add Eggs & Flavorings
Add in the eggs, vanilla extract, and white vinegar. Mix until the batter is smooth and well combined.
Step 4: Incorporate Dry Ingredients
Gently fold in the all-purpose flour. Before it’s completely mixed in, add about 7 drops of red food coloring. Continue adding more drops until you achieve your desired shade of red.
Step 5: Add White Chocolate Chips
Fold in ½ cup of the white chocolate chips into the batter for an extra touch of sweetness.
Step 6: Bake
Pour the batter into your prepared baking pan and smooth out the top. Sprinkle the remaining ½ cup of white chocolate chips evenly over the surface. Bake in your preheated oven for 22–25 minutes or until a toothpick inserted in the center comes out with a few moist crumbs.
Step 7: Cool & Serve
Allow your brownies to cool in the pan for at least one hour before slicing them into squares and serving.
Enjoy these delightful Red Velvet Brownies, whether at a gathering or as a treat just for yourself!
How to Serve Red Velvet Brownies
Red Velvet Brownies are not just a treat; they can be served in a variety of delightful ways to suit any occasion. Whether you’re hosting a gathering or enjoying a quiet night at home, these suggestions will elevate your dessert experience.
Pair with Ice Cream
- Vanilla Ice Cream – The creamy texture complements the richness of the brownies.
- Strawberry Sorbet – A refreshing contrast that enhances the flavors of red velvet.
Drizzle with Sauce
- Cream Cheese Frosting – Adds an extra layer of sweetness that pairs perfectly.
- Chocolate Sauce – For chocolate lovers, this creates a decadent combination.
Top with Whipped Cream
- Fresh Whipped Cream – Lightens the dessert and adds a fluffy texture on top.
- Flavored Whipped Cream – Consider vanilla or almond for added depth.
Serve Warm
- Warm Brownies – Heat them slightly before serving for a melty treat.
- Pair with Hot Drinks – Enjoy alongside coffee or hot chocolate for a cozy feel.
Garnish with Berries
- Fresh Raspberries – Their tartness balances the sweetness of the brownies nicely.
- Sliced Strawberries – Adds a pop of color and freshness to your plate.
How to Perfect Red Velvet Brownies
To achieve the ultimate Red Velvet Brownies, follow these simple tips for baking success.
- Use Room Temperature Ingredients: This helps create a smoother batter and ensures even mixing.
- Don’t Overmix: Gently fold in ingredients to keep brownies fudgy and soft.
- Check Baking Time: Keep an eye on the brownies; they are done when a toothpick has moist crumbs.
- Chill Before Serving: Allowing brownies to cool enhances their flavor and texture.
Best Side Dishes for Red Velvet Brownies
Red Velvet Brownies make an excellent centerpiece, but pairing them with side dishes can enhance your dessert table. Here are some perfect companions:
- Fresh Fruit Salad – A mix of seasonal fruits adds brightness and freshness.
- Cheese Platter – Soft cheeses contrast beautifully with the sweet brownies.
- Coffee – A rich brew rounds out dessert time, enhancing flavors.
- Nut Mix – A crunchy nut mix provides texture and balances sweetness.
- Chocolate Mousse – For chocolate lovers, this rich addition matches well.
- Pecan Pie Bars – Another sweet treat that complements the brownie’s flavor profile.
Common Mistakes to Avoid
When making Red Velvet Brownies, it’s easy to make some common mistakes that can affect the final result. Here are a few to watch out for:
- Using too much flour: Adding more flour than necessary can lead to dry brownies. Always measure flour accurately by spooning it into your measuring cup and leveling it off.
- Overmixing the batter: Overmixing can cause tough brownies. Mix until just combined, especially after adding the flour, to keep them fudgy.
- Not checking for doneness: Baking time can vary depending on your oven. Use a toothpick to check for doneness; it should come out with a few moist crumbs.
- Skipping the cooling step: Cutting the brownies before they cool can lead to a messy slice. Allow them to cool in the pan for at least an hour for cleaner cuts.
- Ignoring food coloring adjustments: Adding too much or too little food coloring can impact the appearance. Start with fewer drops and gradually add until you reach your desired red hue.
Storage & Reheating Instructions
Refrigerator Storage
- Store in an airtight container: Keep the brownies fresh by transferring them into an airtight container.
- Duration: They will last in the fridge for up to 5 days without losing their flavor.
Freezing Red Velvet Brownies
- Wrap tightly: Wrap each brownie in plastic wrap, then place them in a freezer-safe bag or container.
- Duration: Frozen brownies can be stored for up to 3 months.
Reheating Red Velvet Brownies
- Oven: Preheat your oven to 350°F (175°C). Place brownies on a baking sheet and heat for about 10 minutes until warm.
- Microwave: Place a brownie on a microwave-safe plate and heat for 15-20 seconds for a warm treat.
- Stovetop: Use a skillet over low heat and cover with a lid. Heat for about 5 minutes until warmed through.
Frequently Asked Questions
Here are some common questions about making Red Velvet Brownies:
Can I use dark chocolate instead of cocoa powder?
You can substitute dark chocolate for cocoa powder, but you may need to adjust other ingredients accordingly for texture.
How do I achieve a deeper red color in my Red Velvet Brownies?
To get a richer color, gradually add more drops of red food coloring until you reach your desired shade.
Can I make these Red Velvet Brownies gluten-free?
Yes! Substitute all-purpose flour with gluten-free flour blends that are designed for baking.
What is the best way to serve Red Velvet Brownies?
Serve them warm with vanilla ice cream or whipped cream on top for an extra indulgent dessert experience.
How long do these brownies last?
Red Velvet Brownies stay fresh in an airtight container at room temperature for up to 3 days or in the refrigerator for about 5 days.
Final Thoughts
These rich and fudgy Red Velvet Brownies are not just visually stunning but also deliciously satisfying. Their combination of cocoa and sweet white chocolate chips makes them perfect for any occasion—be it holidays, parties, or simply satisfying your sweet tooth. Feel free to customize your brownies by adding nuts or swapping out white chocolate chips with dark chocolate ones!
Did You Enjoy Making This Recipe? Please rate this recipe with ⭐⭐⭐⭐⭐ or leave a comment.
📖 Recipe Card
PrintRed Velvet Brownies
Indulge in the rich and fudgy delight of Red Velvet Brownies, a dessert that captivates with its vibrant color and decadent flavor. These brownies are a perfect fusion of classic red velvet cake and gooey brownie goodness, topped with sweet white chocolate chips for an irresistible twist. Ideal for any occasion—from holidays and parties to a simple treat at home—these brownies are sure to impress family and friends alike. With easy-to-follow instructions and minimal ingredients, even novice bakers can achieve success. Treat yourself or your loved ones to these stunning Red Velvet Brownies that promise satisfaction in every bite.
- Prep Time: 15 minutes
- Cook Time: 25 minutes
- Total Time: 40 minutes
- Yield: Approximately 16 servings 1x
- Category: Dessert
- Method: Baking
- Cuisine: American
Ingredients
- 12 tablespoons unsalted butter, melted
- 5 tablespoons unsweetened cocoa powder
- ½ teaspoon table salt
- 1¼ cups granulated sugar
- 3 large eggs
- ¾ teaspoon vanilla extract
- ¾ teaspoon white vinegar
- 1 cup all-purpose flour
- 10–12 drops red food coloring
- 1 cup white chocolate chips, divided
Instructions
- Preheat your oven to 350°F (175°C). Line a 9×9-inch baking pan with parchment paper.
- In a large bowl, whisk together melted butter, cocoa powder, salt, and sugar until combined.
- Add eggs, vanilla extract, and white vinegar; mix until smooth.
- Gently fold in the flour along with red food coloring until desired color is achieved.
- Stir in ½ cup of white chocolate chips.
- Pour batter into the prepared pan. Top with remaining white chocolate chips.
- Bake for 22–25 minutes, checking doneness with a toothpick (should come out with moist crumbs).
- Allow cooling in the pan for at least one hour before slicing.
Nutrition
- Serving Size: 1 serving
- Calories: 230
- Sugar: 18g
- Sodium: 120mg
- Fat: 12g
- Saturated Fat: 7g
- Unsaturated Fat: 3g
- Trans Fat: 0g
- Carbohydrates: 28g
- Fiber: 1g
- Protein: 3g
- Cholesterol: 35mg
