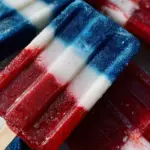
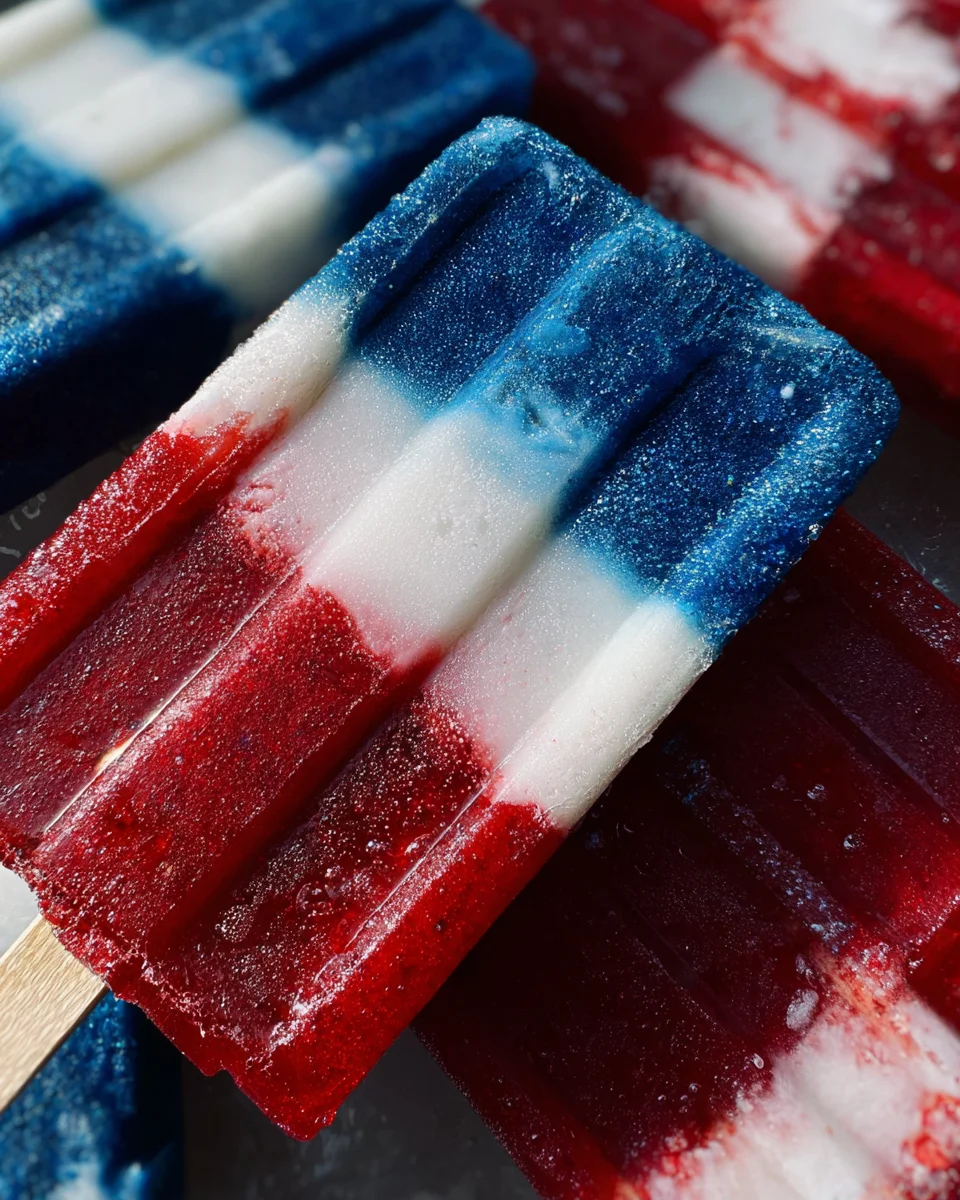
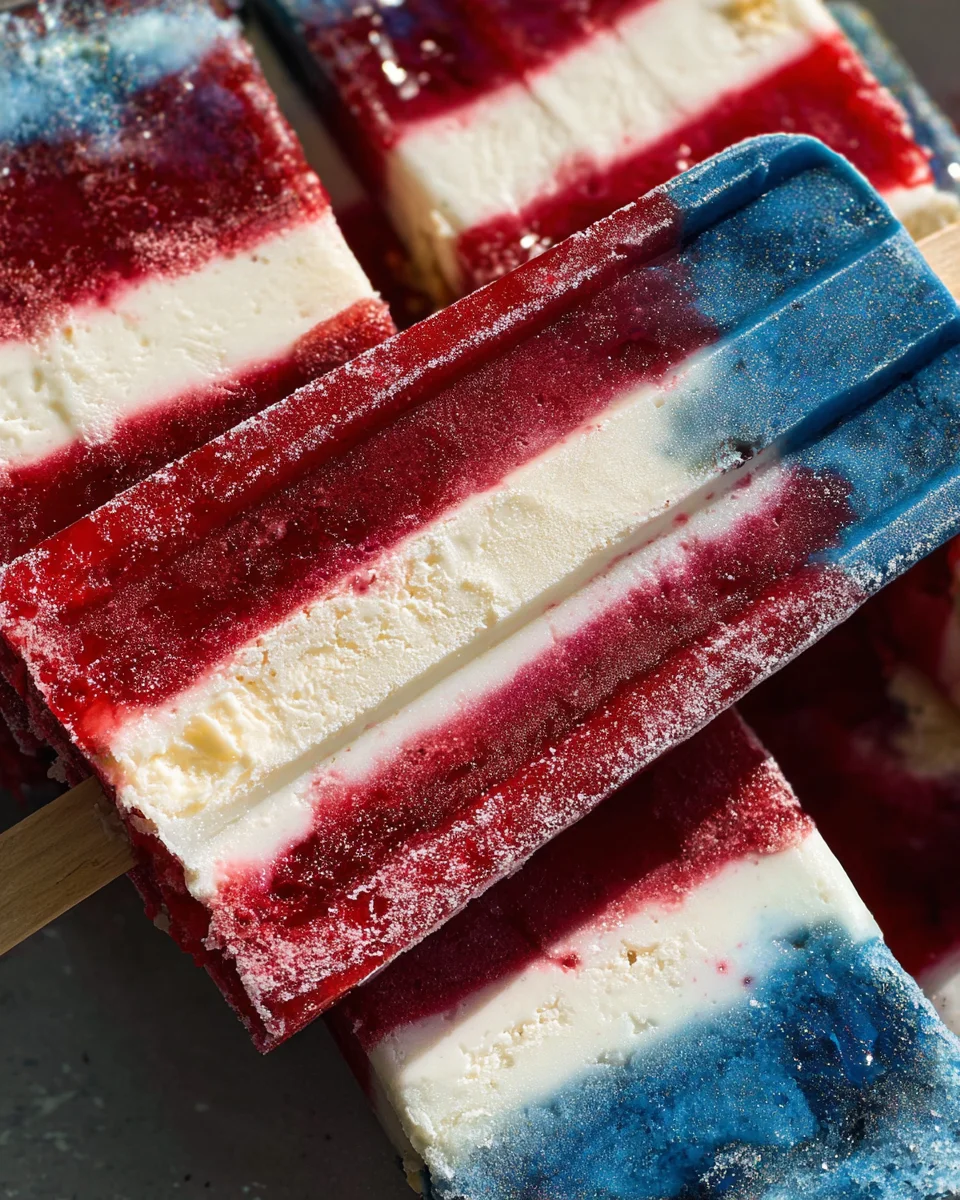
The Red White and Blue Popsicles are a festive treat perfect for summer celebrations, barbecues, or simply enjoying a refreshing snack on a hot day. These layered popsicles not only look stunning with their vibrant colors but also offer a delicious blend of fruity flavors. With their healthy ingredients, they serve as a guilt-free dessert that everyone will love. Whether you’re celebrating the Fourth of July or just want to cool off, these popsicles are the ideal choice!
Jump to:
- Why You’ll Love This Recipe
- Tools and Preparation
- Essential Tools and Equipment
- Importance of Each Tool
- Ingredients
- Red Layer:
- White Layer:
- Blue Layer:
- How to Make Red White and Blue Popsicles
- Step 1: Prepare the Red Layer
- Step 2: Create the White Layer
- Step 3: Prepare the Blue Layer
- Step 4: Serve Your Popsicles
- How to Serve Red White and Blue Popsicles
- For a Festive Touch
- Pair with Refreshing Beverages
- Create a Dessert Platter
- Make it a Family Activity
- How to Perfect Red White and Blue Popsicles
- Best Side Dishes for Red White and Blue Popsicles
- Common Mistakes to Avoid
- Storage & Reheating Instructions
- Refrigerator Storage
- Freezing Red White and Blue Popsicles
- Reheating Red White and Blue Popsicles
- Frequently Asked Questions
- How do I make Red White and Blue Popsicles without coconut milk?
- Can I add other fruits to my Red White and Blue Popsicles?
- How long do Red White and Blue Popsicles take to freeze?
- Are Red White and Blue Popsicles healthy?
- Final Thoughts
- 📖 Recipe Card
Why You’ll Love This Recipe
- Visually Stunning: The vibrant layers of red, white, and blue make these popsicles a showstopper at any gathering.
- Healthy Ingredients: Made with fresh fruits and coconut milk, they provide a nutritious alternative to store-bought treats.
- Easy to Make: With simple steps and no special equipment required, anyone can whip up these delightful popsicles.
- Customizable Flavors: You can easily adjust sweetness or add your favorite fruits to personalize your popsicle experience.
- Perfect for Any Occasion: From summer parties to family gatherings, these popsicles fit right in with their patriotic theme.
Tools and Preparation
Creating the perfect popsicles requires just a few essential tools. Having the right equipment will make the process smooth and enjoyable.
Essential Tools and Equipment
- Ice pop molds
- High-speed blender
- Clean blender for layering
- Popsicle sticks
Importance of Each Tool
- Ice pop molds: These are crucial for shaping your popsicles. They hold the layers together perfectly while freezing.
- High-speed blender: A powerful blender ensures that your fruit mixes are smooth and well-combined, resulting in creamy layers.
- Popsicle sticks: Essential for easy handling once the popsicles are frozen; they help you enjoy your treats without mess.
Ingredients
Red Layer:
- 1 cup raspberries
- 1 tbsp maple syrup (optional)
- 1-2 tbsp water
White Layer:
- 1 cup canned coconut milk
- 1 tbsp maple syrup (optional)
Blue Layer:
- ¼ tsp blue spirulina powder
- 1 cup coconut milk
- 1 tbsp maple syrup (optional)
- ¼ cup blueberries (optional, will turn purple blue if added)
How to Make Red White and Blue Popsicles
Step 1: Prepare the Red Layer
- Combine the raspberries, maple syrup, and water in a high-speed blender.
- Blend until very smooth.
- Pour about 1 ½ tablespoons of the mixture into each ice pop mold.
- Place the molds in the freezer to set for at least 30 minutes.
Step 2: Create the White Layer
- While the red layer is freezing, combine the coconut milk and maple syrup in a clean blender.
- Blend until smooth.
- Once the red layer is set, add a heaping 1 – 1 ½ tablespoons of this white mixture to each mold.
- Return molds to the freezer for at least 2 hours.
Step 3: Prepare the Blue Layer
- In a blender, add the coconut milk, blue spirulina, and maple syrup.
- Blend until smooth.
- Remove molds from freezer and carefully add the blue layer on top.
- Insert a popsicle stick into each mold and freeze until firm, about 5 hours.
Step 4: Serve Your Popsicles
To remove your popsicles from their molds, run them under hot water for about 10 seconds before serving. Enjoy these frozen treats immediately or keep any extras stored in the freezer for up to a month!
How to Serve Red White and Blue Popsicles
These vibrant Red White and Blue Popsicles are perfect for summer gatherings, barbecues, or festive celebrations. Here are some fun serving suggestions to elevate your popsicle experience.
For a Festive Touch
- Garnish with Fresh Berries: Add fresh raspberries, blueberries, or strawberries on top of each popsicle for an extra burst of flavor.
- Serve in Patriotic Cups: Use red, white, and blue cups to enhance the theme during holiday celebrations.
Pair with Refreshing Beverages
- Serve with Lemonade: The tartness of lemonade complements the sweetness of the popsicles beautifully.
- Offer Sparkling Water: A light sparkling water can cleanse the palate between bites of these fruity treats.
Create a Dessert Platter
- Mix with Other Frozen Treats: Include yogurt popsicles or sorbet for variety on your dessert platter.
- Add Dipping Sauces: Serve alongside chocolate or fruit syrups for a fun dipping experience.
Make it a Family Activity
- Involve Kids in Decoration: Let kids decorate their own popsicles with toppings like shredded coconut or edible glitter.
- Host a Popsicle Tasting: Invite friends over for a tasting party where everyone can sample different flavors and combinations.
How to Perfect Red White and Blue Popsicles
Creating the perfect Red White and Blue Popsicles involves more than just following the recipe. Here are some tips to ensure they come out delicious every time.
- Bold Fruit Choices: Use ripe berries for the best flavor; they should be sweet and juicy.
- Adjust Sweetness: Taste each layer before freezing and adjust maple syrup to your preference.
- Layer Carefully: Pour each layer slowly to avoid mixing; let one layer freeze before adding the next.
- Use Silicone Molds: They make removing popsicles easier compared to traditional plastic molds.
- Experiment with Flavors: Try adding different fruits or extracts for unique variations on this classic treat.
Best Side Dishes for Red White and Blue Popsicles
These popsicles are delightful on their own but pairing them with side dishes can create an unforgettable summer feast. Consider these tasty options:
- Fresh Fruit Salad: A mix of seasonal fruits that complements the flavors in the popsicles perfectly.
- Grilled Veggies: Lightly seasoned zucchini, bell peppers, and corn add a savory touch to balance the sweetness.
- Caprese Skewers: Cherry tomatoes, basil, and mozzarella drizzled with balsamic glaze provide refreshing bites.
- Cheese Platter: A selection of cheeses pairs well with fruity desserts—consider soft brie or sharp cheddar.
- Potato Salad: A creamy potato salad can serve as a hearty side to round out your meal.
- Veggie Chips: Crunchy veggie chips offer a satisfying contrast to the soft texture of popsicles.
Common Mistakes to Avoid
Making Red White and Blue Popsicles can be a fun activity, but it’s easy to make mistakes. Here are some common pitfalls to watch out for.
- Skipping the Freezing Time: Not allowing each layer to freeze properly can cause them to blend together. Make sure each layer is set before adding the next.
- Using Too Much Sweetener: Over-sweetening can mask the natural fruit flavors. Start with less maple syrup and adjust according to your taste.
- Ignoring the Blender’s Power: A high-speed blender gives the best texture. If you use a lower-powered blender, you might end up with chunky layers instead of smooth ones.
- Not Tapping the Molds: After pouring in each layer, tap the molds gently on the counter. This helps remove air bubbles and ensures even layers.
- Forgetting About the Popsicle Sticks: If you don’t insert the sticks properly, they may not stay in place as the popsicles freeze. Wait until the top layer is slightly firm before inserting them.
Storage & Reheating Instructions
Refrigerator Storage
- Store any leftover popsicles in an airtight container for up to 5 days if kept in the refrigerator.
Freezing Red White and Blue Popsicles
- Freeze popsicles for up to a month in well-sealed freezer bags or containers.
- Keep layers separated by placing parchment paper between them if necessary.
Reheating Red White and Blue Popsicles
- Oven: Not applicable for popsicles; they are best enjoyed frozen.
- Microwave: Avoid using a microwave as it will melt them unevenly; enjoy straight from the freezer.
- Stovetop: Reheating is not recommended; these treats are meant to be served frozen.
Frequently Asked Questions
How do I make Red White and Blue Popsicles without coconut milk?
You can substitute coconut milk with almond milk or yogurt for a different flavor profile while still enjoying this refreshing treat.
Can I add other fruits to my Red White and Blue Popsicles?
Absolutely! You can customize your popsicles by adding fruits like strawberries, bananas, or mangoes for more variety. Just remember that this may change their color slightly.
How long do Red White and Blue Popsicles take to freeze?
These popsicles typically need around 5 hours to freeze completely after all layers are added. For optimal results, allow overnight freezing.
Are Red White and Blue Popsicles healthy?
Yes! They are made with fresh fruits and coconut milk, making them a nutritious snack option for hot summer days.
Final Thoughts
These Red White and Blue Popsicles are not only visually stunning but also deliciously refreshing. They’re perfect for summer gatherings or as a healthy snack anytime. Feel free to customize your popsicles by experimenting with different fruits or sweeteners!
Did You Enjoy Making This Recipe? Please rate this recipe with ⭐⭐⭐⭐⭐ or leave a comment.
📖 Recipe Card
PrintRed White and Blue Popsicles
Indulge in the festive spirit of summer with these vibrant Red White and Blue Popsicles! Perfect for barbecues, family gatherings, or a refreshing snack on a hot day, these layered popsicles are not just visually stunning; they’re also healthy and delicious. Made with fresh fruits and creamy coconut milk, they offer a guilt-free dessert option that everyone will adore. Customizable in flavor and easy to prepare, these popsicles are ideal for celebrating the Fourth of July or simply cooling off during the warm months. Get ready to impress your guests with this colorful treat!
- Prep Time: 15 minutes
- Cook Time: 8 hours (includes freezing)
- Total Time: 8 hours 15 minutes
- Yield: Makes about 6 popsicles 1x
- Category: Dessert
- Method: Freezing
- Cuisine: American
Ingredients
- 1 cup raspberries
- 1 tbsp maple syrup (optional)
- 1–2 tbsp water
- 1 cup canned coconut milk
- ¼ tsp blue spirulina powder
- 1 cup coconut milk
- 1 tbsp maple syrup (optional)
- ¼ cup blueberries (optional)
Instructions
- For the red layer, blend raspberries, maple syrup, and water until smooth. Pour into molds and freeze for 30 minutes.
- Mix coconut milk and maple syrup for the white layer; add to molds after the red layer is set. Freeze for 2 hours.
- For the blue layer, blend coconut milk, blue spirulina, and maple syrup. Pour over the white layer and insert sticks; freeze for 5 hours until firm.
- To serve, run molds under warm water for a few seconds before removing.
Nutrition
- Serving Size: 1 popsicle
- Calories: 60
- Sugar: 10g
- Sodium: 20mg
- Fat: 2g
- Saturated Fat: 2g
- Unsaturated Fat: 0g
- Trans Fat: 0g
- Carbohydrates: 12g
- Fiber: 1g
- Protein: 1g
- Cholesterol: 0mg
