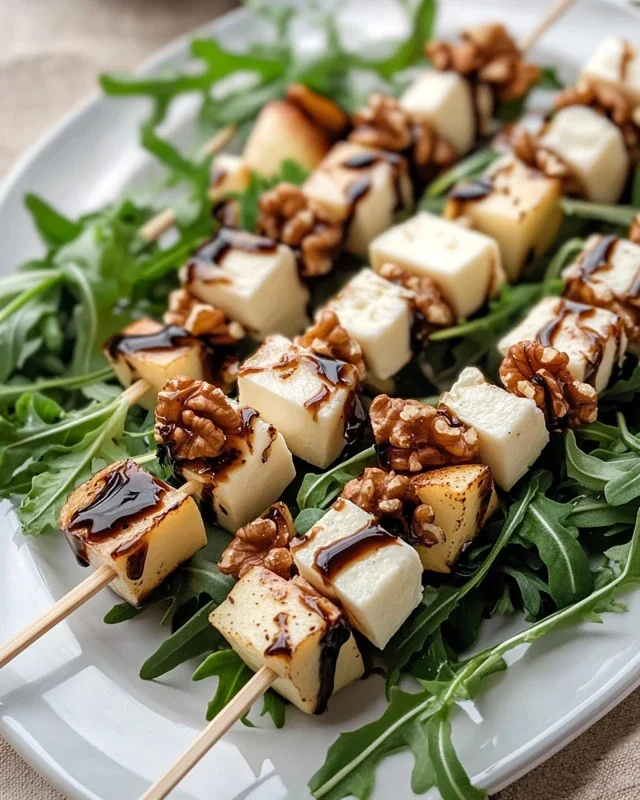
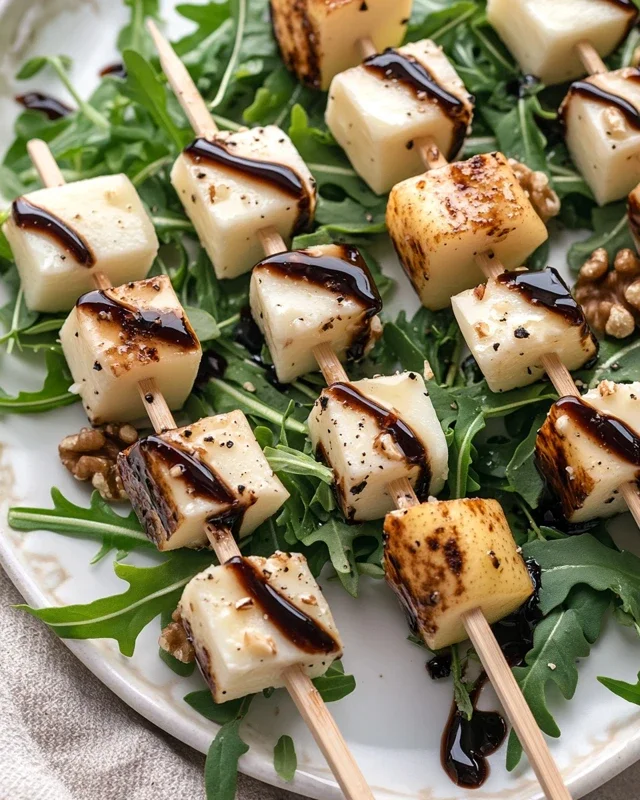
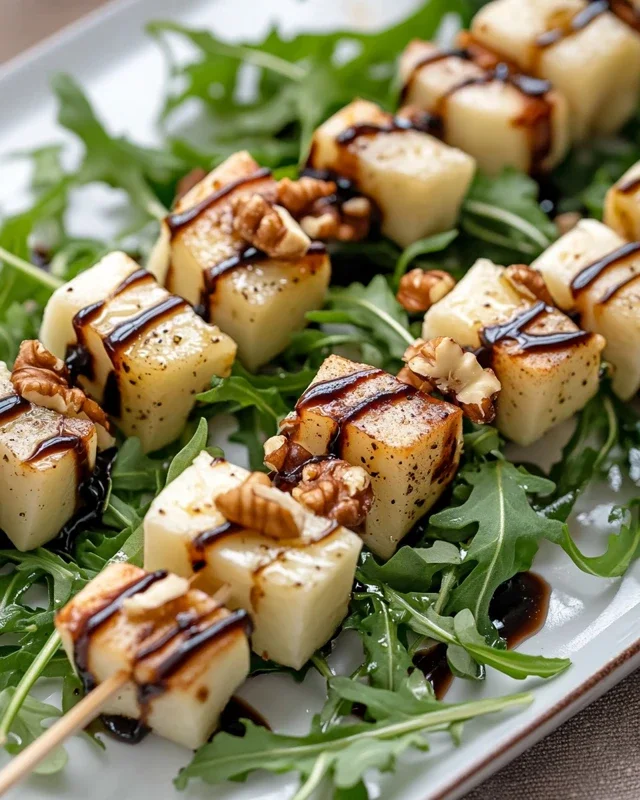
These Pear & Brie Cheese Salad Skewers are a delightful blend of sweet and savory flavors, perfect for elevating any gathering. With juicy pears, creamy brie, and peppery arugula, this no-cook appetizer is not only easy to prepare but also visually stunning. Ideal for parties, holidays, or casual get-togethers, these skewers will impress your guests with their unique combination of tastes and textures.
Why You’ll Love This Recipe
- Easy to Prepare: No cooking required—simply assemble the ingredients for a quick appetizer.
- Flavorful Combination: The mix of sweet pears and rich brie creates a delightful taste experience.
- Versatile Serving Options: Perfect for parties, picnics, or as an elegant starter at holiday dinners.
- Healthy Ingredients: Packed with fresh produce and nuts, it’s a nutritious choice for any occasion.
- Beautiful Presentation: The colorful skewers make for an eye-catching addition to any table setting.
Tools and Preparation
Having the right tools can make your cooking experience smoother and more enjoyable. Below are some essential items that will help you create these delicious skewers.
Essential Tools and Equipment
- Small skewers (4-inch)
- Cutting board
- Sharp knife
- Serving platter
Importance of Each Tool
- Small skewers: These are essential for assembling your pear & brie cheese salad skewers quickly and easily.
- Cutting board: A sturdy surface is necessary for safe and efficient cutting of fruits and cheese.
- Sharp knife: A sharp knife helps in making clean cuts on both the pears and brie, ensuring uniform pieces.
Ingredients
Here’s what you’ll need to make your Pear & Brie Cheese Salad Skewers:
Fruits
- 2 ripe pears (Bosc or Bartlett recommended)
Cheese
- 8 ounces brie cheese (about 225 grams)
Greens
- 2 cups baby arugula
Nuts
- 1/4 cup raw walnuts, finely chopped
Condiment
- Balsamic glaze, for drizzling (or balsamic vinegar)
Skewers
- Small 4-inch skewers
How to Make Pear & Brie Cheese Salad Skewers
Step 1: Prepare the Pears
- Slice the pears into quarters and remove the seeds and stems.
- Cut each quarter into roughly 1/2-inch cubes.
Step 2: Cut the Brie Cheese
- Cut the brie cheese into 1/2-inch cubes, similar in size to the pears.
- Leaving the rind on helps make handling easier.
Step 3: Assemble the Skewers
- Take a small skewer and thread on one piece of pear, followed by a small folded bundle of arugula (about 5–6 leaves), and one cube of brie.
- Insert the skewer through the rind side of the brie for better stability.
Step 4: Finish Assembling
- Place each assembled skewer on a serving platter.
- Repeat until all pears and brie are used.
Step 5: Add Walnuts and Glaze
- Gently press a few pieces of chopped walnuts onto each piece of brie so they stick.
- Drizzle balsamic glaze over the skewers just before serving.
- Serve immediately for best freshness.
Enjoy creating these beautiful Pear & Brie Cheese Salad Skewers that are sure to be a hit at your next gathering!
How to Serve Pear & Brie Cheese Salad Skewers
These pear and brie cheese salad skewers are a delightful appetizer that can be served in various ways. They add an elegant touch to any gathering and can be paired with complementary flavors for an enhanced experience.
With Fresh Herbs
- Basil or Mint: Add fresh basil or mint leaves to the skewers for an aromatic boost.
- Chives: Sprinkle chopped chives on top for a mild onion flavor.
Alongside Dips
- Honey: Drizzle honey over the skewers for added sweetness that pairs well with the cheese.
- Hummus: Serve with a side of hummus for a creamy contrast.
As Part of a Charcuterie Board
- Cheese Variety: Include these skewers on a charcuterie board alongside different cheeses and meats.
- Fruit Selection: Pair with other fruits like figs, grapes, or apples for variety.
With Seasonal Vegetables
- Carrot Sticks: Offer crunchy carrot sticks on the side to balance the creaminess of the brie.
- Cucumber Slices: Pair with cucumber slices for a refreshing bite.
How to Perfect Pear & Brie Cheese Salad Skewers
To ensure your pear and brie cheese salad skewers are perfect every time, follow these simple tips.
- Use ripe pears: Select ripe but firm pears to maintain structure during assembly.
- Keep the rind on brie: Leaving the rind makes it easier to handle and adds texture.
- Avoid browning: Assemble within two hours of serving to keep ingredients fresh.
- Add nuts last: Wait until just before serving to add walnuts for extra crunch without sogginess.
Best Side Dishes for Pear & Brie Cheese Salad Skewers
Pairing side dishes with your pear and brie cheese salad skewers enhances the overall meal. Here are some great options:
- Mixed Green Salad: A light salad with vinaigrette complements the richness of the skewers.
- Roasted Vegetables: Seasonal roasted vegetables add warmth and depth to your spread.
- Quinoa Salad: A protein-rich quinoa salad provides a hearty contrast to the light appetizers.
- Stuffed Mushrooms: Savory stuffed mushrooms make a delicious addition to any platter.
- Bruschetta: Toasted bread topped with tomatoes and basil pairs well with the flavors of pear and brie.
- Savory Scones: Cheddar or herb scones offer a delightful texture alongside the skewers.
Common Mistakes to Avoid
When making Pear & Brie Cheese Salad Skewers, it’s easy to overlook a few details. Here are some common mistakes and tips to help you avoid them.
- Using unripe pears – Unripe pears can be hard and difficult to skewer. Choose ripe but firm pears for the best texture and flavor.
- Cutting uneven pieces – If the pear and cheese pieces are not similar in size, the skewers may not balance well. Aim for 1/2-inch cubes for even assembly.
- Skipping the balsamic glaze – Not drizzling balsamic glaze can make the skewers taste bland. This adds a delicious sweet tang that enhances the flavors.
- Assembling too early – If you prepare the skewers too far in advance, they may brown and lose freshness. Assemble them within 2 hours of serving for best results.
- Neglecting to press walnuts – Failing to press walnuts onto the brie may cause them to fall off when serving. Ensure they stick by gently pressing them onto the cheese.
Storage & Reheating Instructions
Refrigerator Storage
- Store leftover skewers in an airtight container.
- They can last up to 2 days in the refrigerator.
- Keep any extra balsamic glaze separate until ready to serve.
Freezing Pear & Brie Cheese Salad Skewers
- It is not recommended to freeze these skewers as they contain fresh ingredients that do not thaw well.
- For best flavor and texture, enjoy them fresh.
Reheating Pear & Brie Cheese Salad Skewers
- Oven – Preheat your oven to 350°F (175°C) and heat for about 5-10 minutes until warmed through.
- Microwave – Heat on medium power for 20-30 seconds, checking frequently to avoid melting the cheese too much.
- Stovetop – Place in a pan over low heat, cover with a lid, and warm gently for about 5 minutes.
Frequently Asked Questions
Here are some common questions about preparing Pear & Brie Cheese Salad Skewers.
Can I use other cheeses instead of brie?
Yes! You can substitute brie with blue cheese, camembert, or even Monterey Jack for different flavors.
How do I choose ripe pears for my salad skewers?
Look for pears that give slightly when pressed but are still firm. Bosc or Bartlett varieties work best.
What can I pair with Pear & Brie Cheese Salad Skewers?
These skewers pair wonderfully with a light white wine or sparkling water for a refreshing complement.
How long will my skewers stay fresh?
If stored properly in the refrigerator, they will last up to 2 days but are best enjoyed within a few hours of assembly.
Final Thoughts
Pear & Brie Cheese Salad Skewers are an appealing blend of flavors that can add charm to any gathering. Their versatility allows you to customize ingredients based on your preferences or what you have on hand. Enjoy this delightful appetizer at your next event!

Pear & Brie Cheese Salad Skewers
- Total Time: 15 minutes
- Yield: Approximately 10 skewers 1x
Description
Elevate your gatherings with these Pear & Brie Cheese Salad Skewers, a no-cook appetizer that combines the sweetness of ripe pears, the creaminess of brie, and the peppery bite of arugula. Perfectly assembled on small skewers, these delightful bites are not only visually appealing but also packed with flavor. Drizzled with balsamic glaze and garnished with crunchy walnuts, they make for an elegant starter at parties or casual get-togethers. Easy to prepare and impressive in presentation, these skewers are sure to be a hit at any occasion.
Ingredients
- 2 ripe pears (Bosc or Bartlett)
- 8 ounces brie cheese
- 2 cups baby arugula
- 1/4 cup raw walnuts, finely chopped
- Balsamic glaze (for drizzling)
- Small 4-inch skewers
Instructions
- Slice the pears into quarters, remove seeds and stems, then cut each quarter into 1/2-inch cubes.
- Cut brie cheese into similar-sized cubes (1/2-inch), keeping the rind on for easier handling.
- Thread a piece of pear, a small bundle of arugula (5–6 leaves), and a cube of brie onto the skewer.
- Place each skewer on a serving platter and repeat until all ingredients are used.
- Press chopped walnuts onto each piece of brie and drizzle with balsamic glaze just before serving.
- Prep Time: 15 minutes
- Cook Time: 0 minutes
- Category: Appetizer
- Method: No-cook
- Cuisine: Fusion
Nutrition
- Serving Size: 1 skewer (approximately 40g)
- Calories: 120
- Sugar: 6g
- Sodium: 150mg
- Fat: 8g
- Saturated Fat: 3g
- Unsaturated Fat: 5g
- Trans Fat: 0g
- Carbohydrates: 10g
- Fiber: 1g
- Protein: 3g
- Cholesterol: 15mg


Leave a Comment